
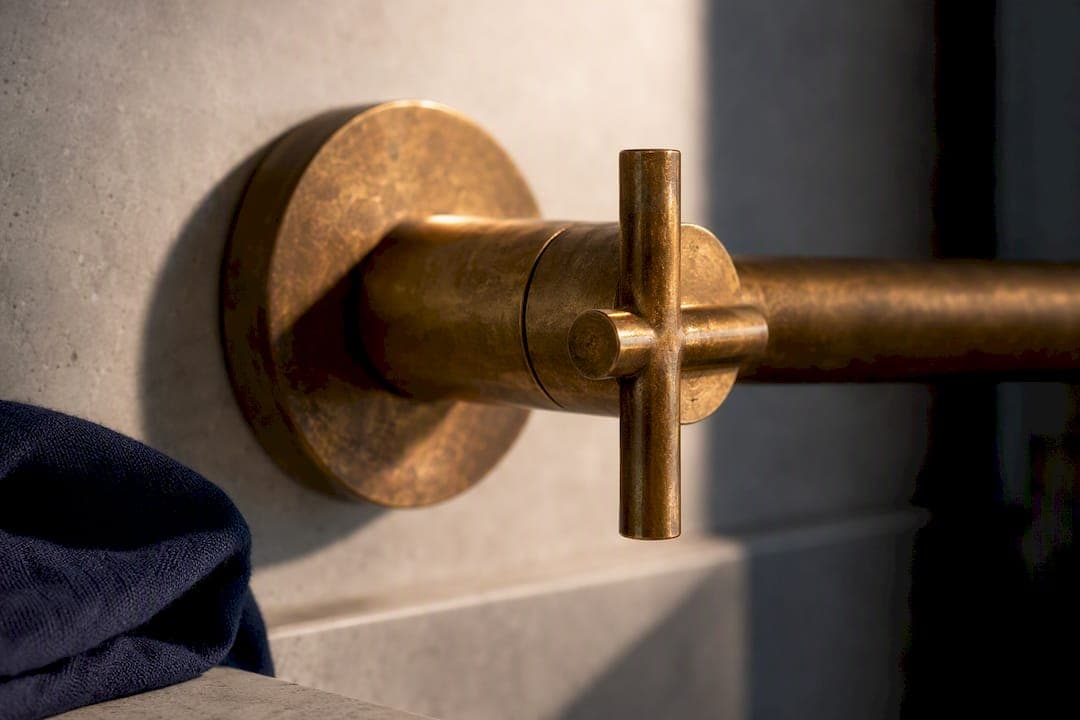
Patina is a protective living finish, not tarnish, and treating it that way changes everything about upkeep. Protect it with gentle weekly cleaning, thorough drying after use, and a firm ban on harsh chemicals or abrasive pads. If you want to slow the ageing further, a microcrystalline wax buys you time; if you have decided you want bright brass back, a non-abrasive polish will take you there.
TL;DR:
- Regular gentle cleaning with mild soap and immediate drying prevents uneven spots and mineral deposits on unlacquered brass surfaces.
- Avoid acids, ammonia, bleach, abrasive pads, and metal polishes, as they strip or damage the protective patina layer.
- Applying microcrystalline wax every few months slows patina development without sealing the metal permanently.
- Environmental factors like humidity, water hardness, and high contact speed influence how quickly brass patinas, especially in coastal or humid areas.
- Restoring brightness resets the patina process, and deliberate neglect or minimal maintenance fosters a natural, appealing aging.
Table of Contents
- What is brass patina and how does it form?
- How to clean brass without stripping the patina
- What ruins brass patina fastest?
- Should you wax or lacquer brass to slow ageing?
- Can you restore brass patina back to bright metal?
- How long does it take for brass to develop a full patina?
- Designer's perspective: specifying a living finish with confidence
- Living finishes, from where we sit
- Bring your own brass detailing to a bespoke piece
- Sources
What is brass patina and how does it form?
Patina is the thin oxide layer that forms on the surface of unlacquered brass as copper, one of its principal alloy metals, reacts slowly with air and moisture. It is not corrosion in the sense that rust is corrosion. It is a stable, protective film that actually shields the metal beneath it, and it is the reason brass fittings from a Georgian townhouse can still look glorious two centuries on. Homeowners occasionally mistake the early stages for dirt and reach for a scouring pad. That instinct, understandable as it is, is the single most common cause of a blotchy, uneven finish.
Whether that reaction happens at all comes down to one specification choice made long before the piece arrives in your home: lacquered or unlacquered. Lacquered brass has a clear polymer sealant baked onto the surface at the factory, which keeps the metal locked at whatever brightness it left the workshop. It stays shiny, but permanently, and when the lacquer eventually fails, usually after a decade or so of wear, it fails unevenly, leaving patches that look considerably worse than a natural patina ever would. Unlacquered brass has no such barrier. It is left to breathe, which is precisely why designers and trade clients often specify it deliberately: it ages with the room rather than sitting apart from it.
The visual journey follows a fairly predictable arc, and it is worth knowing what to expect so you do not mistake normal ageing for a problem:
- Within the first few weeks, expect a subtle warming from bright yellow towards a softer honey tone.
- Over several months, that warmth deepens into a richer amber, particularly on pieces handled or used daily.
- By one to two years, the colour develops genuine depth, sometimes with faint variation across the surface that tends to even out with continued gentle use.
- High-touch points such as door handles, tap levers, and drawer pulls darken faster than low-touch decorative elements, simply because skin oils and repeated contact accelerate the oxide layer's development.
Green spots, known properly as verdigris, are the exception that worries people most and deserves the least worry in practice. They form mainly in very humid or coastal settings where moisture sits on the surface for extended periods, and in an ordinary kitchen or bathroom with regular drying they essentially never appear. Where they do turn up, they are usually reversible rather than a sign of permanent damage.
How to clean brass without stripping the patina
Cleaning brass patina correctly is less about products and more about restraint. The goal each week is to lift surface grime and fingerprints without disturbing the oxide layer underneath, and that takes barely five minutes.
Weekly wipe:
- Dilute a small amount of mild dish soap in warm water.
- Dampen a soft microfibre cloth in the solution, not soaking wet.
- Wipe the surface in the direction of any grain or hammered texture.
- Rinse the cloth, wipe again with clean water to remove soap residue.
- Dry immediately with a second, dry microfibre cloth.
Monthly deeper clean:
- Fill a bowl with warm water and a few drops of mild soap.
- Use a soft-bristle brush, an old toothbrush works well, to reach grooves, hinges, and decorative detailing.
- Rinse thoroughly under running water where the piece allows it.
- Dry every surface completely, paying particular attention to recessed areas where water pools.
That final drying step matters more than any product you could buy. Standing water left on a tap, handle, or fixture is the primary cause of uneven spotting and mineral deposits, and a thirty-second wipe after use prevents most of it before it starts. It costs nothing and takes less time than reading this paragraph.
Keep a small kit near anything brass that sees regular handling: two or three microfibre cloths, a soft-bristle brush, a bottle of mild dish soap, and a small bowl you can fill quickly. There is no need for specialist brass cleaner in this routine at all.
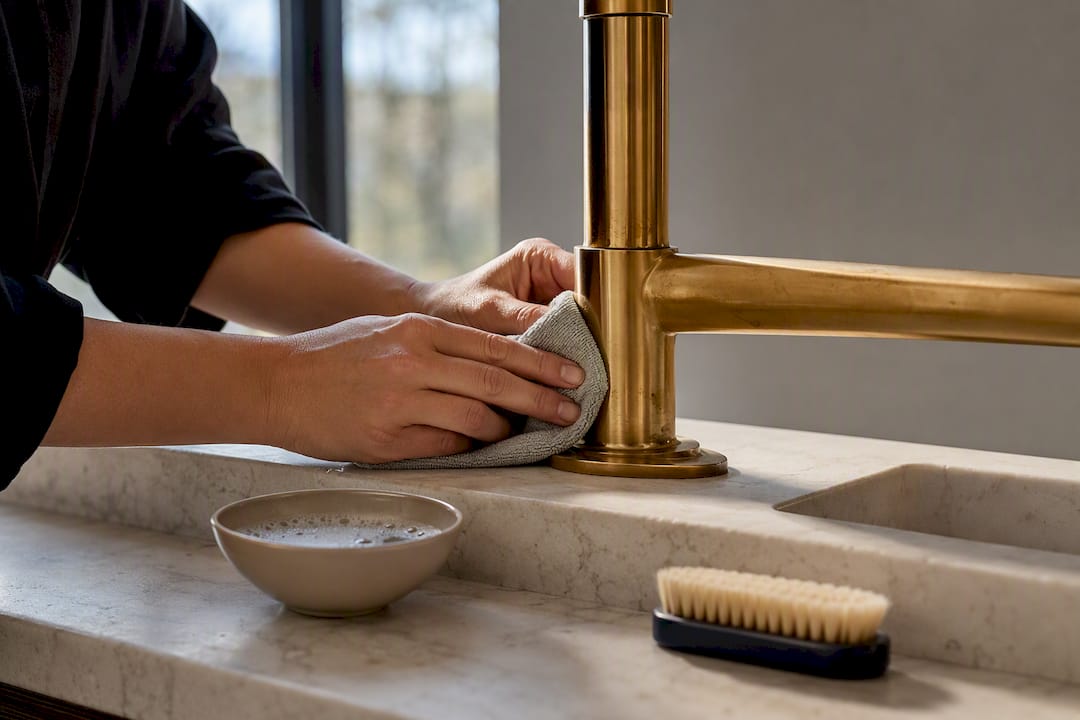
Pro Tip: Keep a dry microfibre cloth folded next to a kitchen tap or bathroom fitting so drying becomes an automatic last step after use, rather than a chore you have to remember separately.
Design professionals who specify unlacquered brass regularly describe the ideal approach as something close to deliberate neglect: dust and wipe, nothing more, and let the metal do what it naturally wants to do. Fighting that process with constant polishing produces a patchier, less convincing result than simply letting the patina settle in on its own timeline.
What ruins brass patina fastest?
Almost every case of blotchy, uneven brass traces back to one of four household products, and knowing what they look like on a label saves considerable regret.
- Acids such as vinegar, lemon juice, and many "natural" cleaning sprays react unpredictably with the oxide layer, stripping it in patches rather than evenly, which leaves a mottled, inconsistent surface that is genuinely difficult to correct without a full polish.
- Ammonia, common in glass and multi-surface cleaners, attacks brass in a similar way and often leaves a hazy, discoloured residue.
- Bleach, including diluted bathroom sprays that list it as an active ingredient, is aggressive enough to strip patina and can pit the surface if left in contact for more than a minute or two.
- Abrasive pads and scouring creams work by physically grinding away the top layer of metal, which is precisely the layer you are trying to protect.
- Metal polishes marketed for brass are formulated to strip tarnish and restore shine. They are polishing agents, not protective products, so using one on a patina you want to keep is self-defeating.
Reading a bottle before you reach for it takes ten seconds. If the ingredients list mentions ammonia, sodium hypochlorite (bleach), acetic acid, or any phrase like "for shine and tarnish removal," put it back and reach for the mild dish soap instead. Once acid has touched a patinated surface, the damage tends to be patchy rather than uniform, and the only real fix at that point is polishing the whole piece back to bright metal to restart the ageing evenly. Manufacturer and trade technical notes consistently point to the same short list of culprits, which tells you this is not a matter of opinion so much as accumulated experience across the industry.
Should you wax or lacquer brass to slow ageing?
If the weekly routine above is all you do, patina will continue developing indefinitely, which suits most people who chose unlacquered brass in the first place. But there are ways to slow the pace or stop it altogether, and the right choice depends entirely on how much control you want over the final look.
- Microcrystalline wax, sold under names including Renaissance Wax, is the accepted trade standard for slowing patination without sealing the surface permanently. A thin coat applied every three to six months creates a barrier against moisture and handling oils, buffed on with a soft cloth and left to cure briefly before buffing off any excess. It will not stop the process; it simply stretches the timeline and evens out the rate of change across a piece.
- Clear lacquer is the permanent option, and it is a genuine trade-off rather than a straightforward upgrade. Once applied, it locks the surface at whatever colour it was when sealed, which suits anyone who wants a fixed, uniform finish, but it also means the "living" quality that draws people to unlacquered brass in the first place disappears. It is generally not the right call if the entire appeal was watching the metal change.
- Carnauba wax or a light coat of pale oil offer a lighter, shorter-lived alternative to microcrystalline wax. They protect for weeks rather than months and need reapplying far more often, which makes them a reasonable stopgap but not a serious long-term strategy.
Choosing between these comes down to a simple question: do you want the brass to keep changing, changing but more slowly, or frozen exactly as it is now? A thin wax coat gives you a controllable middle ground, neither fully static nor left entirely to its own devices, which is why it is the option most trade professionals reach for by default.
Can you restore brass patina back to bright metal?
Restoring a patinated piece to a bright, factory-fresh finish is always possible, and it is a legitimate choice, not a failure of maintenance. It simply comes with a consequence worth understanding before you start.
- Choose a non-abrasive brass polish, apply it with a soft cloth in small sections, and work it in with light pressure rather than scrubbing.
- Rinse thoroughly and dry completely once the polish has lifted the oxide layer, since any residue left behind will affect how the metal re-patinas afterwards.
- If you prefer a DIY approach, a paste of flour, salt, and a little vinegar can work on small fittings, but test it on an inconspicuous area first: the acid content behaves the same way it does in the "what to avoid" cleaners above, and heavy-handed use can mark the surface.
- Expect the piece to begin ageing again from scratch. Polishing effectively resets the patina's clock, and the whole developmental timeline starts over from bright metal.
That reset is precisely why many owners avoid polishing altogether once patina has set in; the aged look was the point, and restarting it feels like a step backwards. Others do it deliberately, ahead of selling a property or refreshing a room's aesthetic, and there is nothing wrong with either choice. For large architectural pieces, ornate antiques, or anything with delicate plating beneath the brass, it is worth calling a professional restorer rather than experimenting on a piece you cannot easily replace.
How long does it take for brass to develop a full patina?
Patina development follows a rough but genuinely useful timeline, and knowing roughly where a piece should be at a given age stops you second-guessing a perfectly normal process.
| Timeframe | What to expect | Influencing factors |
|---|---|---|
| First few weeks | Visible warming from bright yellow to a honey tone, most noticeable on handled surfaces | Frequency of handling, humidity, cleaning habits |
| Year 1–2 | Colour deepens further; early unevenness usually self-corrects with continued gentle use | Water hardness, sunlight exposure, cleaning consistency |
| Year 2–5+ | Patina stabilises into a long-term tone that shifts only gradually from this point | Overall environment, coastal or humid conditions, wax use |
Location does more to speed or slow this along than most owners expect. A kitchen tap used daily develops noticeably faster than a decorative mirror frame in a rarely used hallway, purely because of contact frequency. Hard water areas can also accelerate mineral deposit formation if drying habits slip, which is one more reason the thirty-second wipe after use earns its place as the single best habit in this entire guide. Coastal properties see faster change too, thanks to airborne salt and higher ambient humidity, which is worth flagging early if you are specifying unlacquered brass for a seaside project.
Designer's perspective: specifying a living finish with confidence
Trade clients ask us fairly often whether unlacquered brass is a maintenance risk, and the honest answer is that it is less demanding than people assume, provided expectations are set correctly at the briefing stage. The living finish philosophy only works when a client understands, before the piece is delivered, that the colour they see on day one is not the colour they will have in a year, and that this is the intended outcome rather than a defect to manage.
A handful of specification notes make that conversation easier. Ventilation matters more than most people realise: a well-ventilated room dries naturally between uses and reduces the drying burden considerably. The drying habit itself is worth writing into a handover note rather than leaving to memory, particularly for hospitality clients managing multiple fittings across a property. And for coastal or heavily exposed outdoor installations, unlacquered brass is rarely the right call at all; the accelerated patination in salt air can outpace what most owners are prepared to manage.
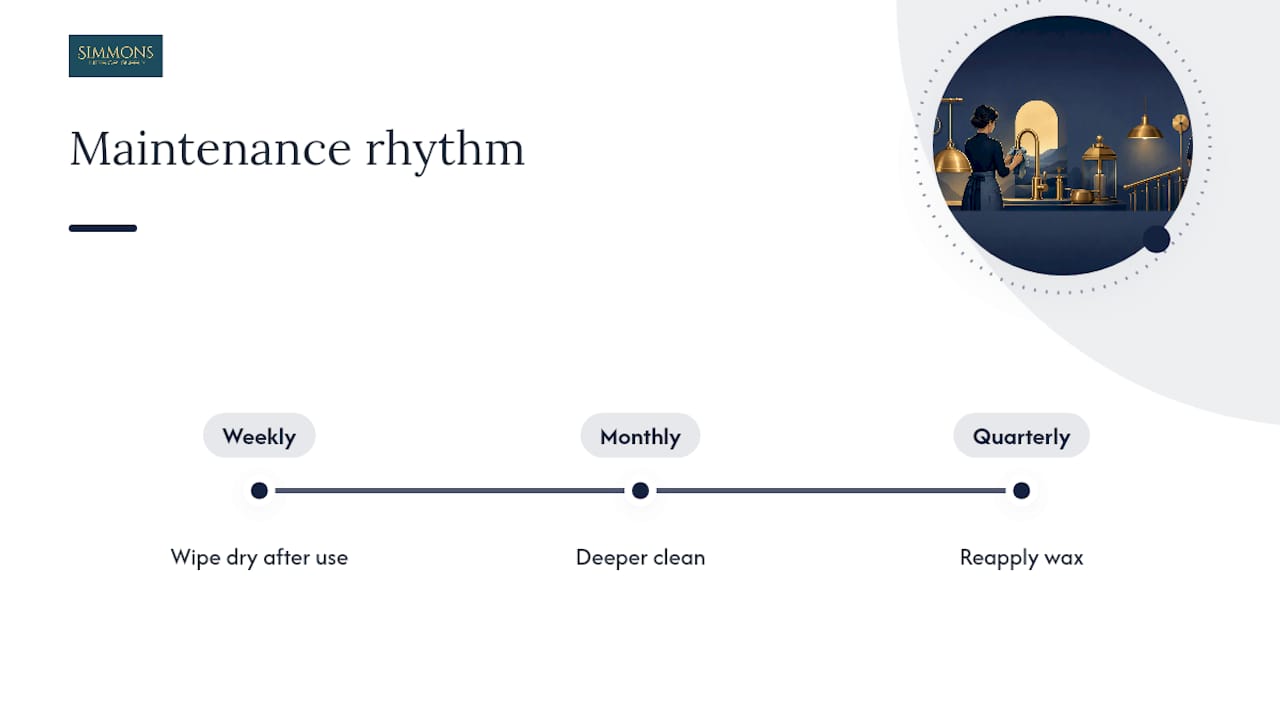
For property handover documentation, a simple maintenance schedule covering weekly wiping, monthly deeper cleans, and a wax reapplication reminder every few months gives homeowners and hotel maintenance teams a concrete routine rather than a vague warning to "be careful." If you are weighing finish options more broadly, our note on antique versus brushed brass covers how different starting finishes affect this long-term picture, and our custom finish specification guide walks through briefing a maker with confidence.
Living finishes, from where we sit
Most of the anxiety around brass patina care comes from a category error: treating a natural, protective process as though it were a maintenance failure waiting to happen. It is not. The metal is doing precisely what unlacquered brass is supposed to do, and the owners who get the most satisfaction from it are usually the ones who intervene the least, not the most.
What tends to go wrong is overcorrection. Someone notices the first honey tones appearing on a handle and reaches for whatever cleaning spray is under the sink, assuming they are removing dirt. That single decision, repeated across a few cleaning sessions, does more damage than a decade of normal handling ever would. The fix is not more effort. It is less, applied more carefully: soap, water, a soft cloth, and the discipline to dry the piece afterwards rather than leaving it to sort itself out.
We would push back gently on the idea that wax is somehow the "correct" answer for anyone serious about their brass. It is a genuinely useful tool for slowing change on high-traffic pieces, but plenty of collectors and designers deliberately skip it, preferring to watch the metal move through its stages unmanaged. There is no single right answer here beyond avoiding the products that do irreversible harm. Everything else is a matter of taste, and taste is allowed to vary from one room, and one owner, to the next.
— Luke
Bring your own brass detailing to a bespoke piece
If this has left you thinking about where unlacquered brass detailing might sit in your own home or project, that is a conversation a bespoke furniture maker is well placed to have. Rather than buying a mass-produced piece and hoping the hardware ages the way you want, working with a maker means the finish is decided at the specification stage, alongside the timber, the proportions, and every other detail of a handcrafted piece built around your space.

Our collections, including pieces like the bespoke nest of coffee tables, are built to order with finish options discussed directly with our artisans rather than picked from a limited factory range. Browse our gallery for examples of how brass and metal detailing has been used across previous commissions, then get in touch through our main site to talk through finish choices for your own bespoke piece.
Sources
The guidance above draws on trade and manufacturer material covering unlacquered brass specifically, rather than general metal-cleaning advice that often glosses over the difference between removing dirt and removing patina.
The Tap Collection's unlacquered brass care guide covers the everyday cleaning routine and the chemicals to avoid in useful detail. Insideast has published two relevant pieces: one on how unlacquered brass ages and the consequences of restoring it, and a year-by-year patina guide covering timelines and green spot formation. Brassna's long-term care guide explains microcrystalline wax application in practical terms. UECO's technical care and patina document offers a manufacturer-level view on the same principles. For those weighing hardware finishes more broadly, One Day Doors & Closets has a useful piece on which hardware colours stay timeless.
- Unlacquered brass finishes: what to expect and how to care for yours — The Tap Collection
- Unlacquered brass care guide — Brassna