
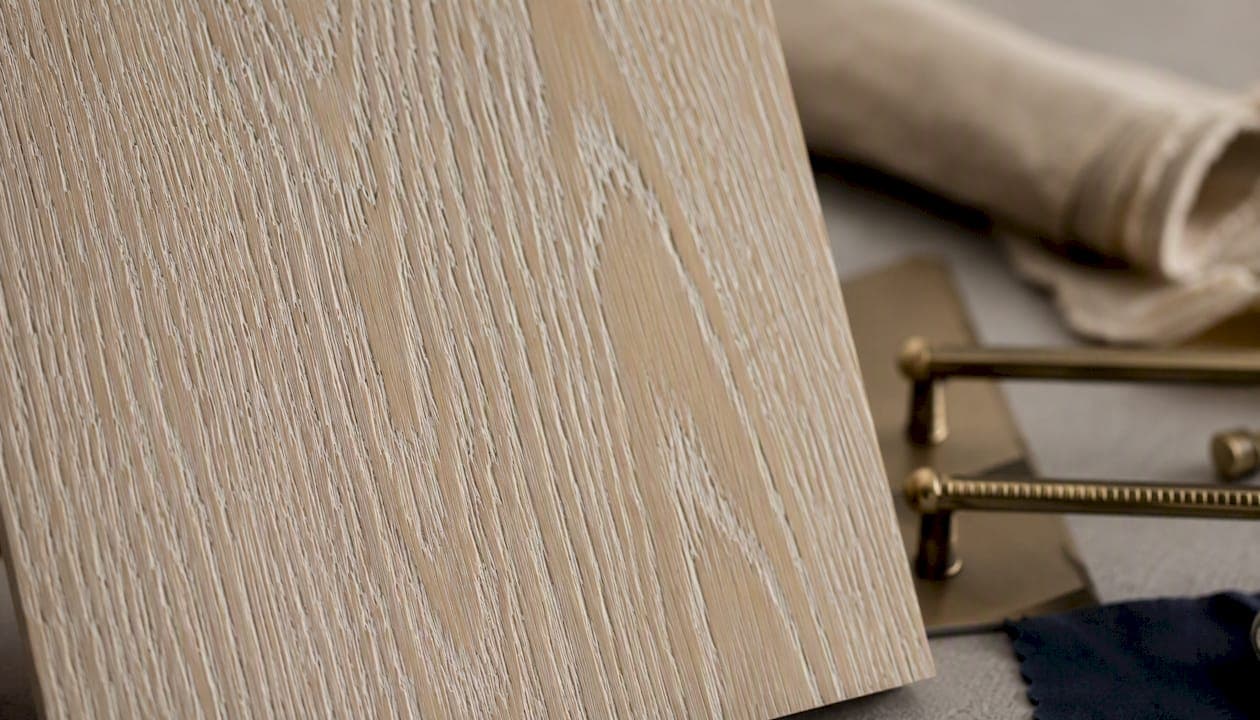
A cerused oak finish is a limed treatment that leaves a contrasting pale pigment sitting in the wood's open pores, throwing the grain into sharp, sculptural relief. Three techniques get you there: a paste wood filler pressed into the grain and wiped back, a powder or paste glaze applied over a sealed base, and a liming wax or cream rubbed on and buffed off. Wire brushing is not a finish in itself. It is the grain-opening step that makes the pores wide enough to hold pigment in the first place.
For most DIY woodworkers, the paste filler method is the one worth mastering first. It gives the crispest, whitest fill and, unlike the powder glaze route, the result is largely predictable before you commit to a topcoat. Ranges such as Rubio Monocoat, available through UK distributors, and Liberon Liming Wax are the two names most British hobbyists will encounter when they start sourcing materials, and we will return to both in detail. If you would rather commission the look on a finished piece than fight it out on scrap oak in the shed, that is precisely the kind of bespoke finishing work Simmonsinteriorsupply takes on for clients and trade partners.
Before you touch a wire brush, it helps to know why this technique has survived five centuries of changing fashion, and why oak in particular takes to it so well.
Key Takeaways
Paste wood filler over a sealed base stain gives DIY woodworkers the most repeatable, controllable route to a genuine cerused oak finish.
| Point | Details |
|---|---|
| Best DIY method | Paste wood filler applied with a squeegee gives the crispest, most predictable pore fill for a first attempt. |
| Test before you commit | Always run the full stain, filler, and topcoat sequence on an offcut, since powder glaze effects only reveal themselves after topcoating. |
| Match substrate to method | Solid oak takes wire brushing and paste filler well; veneer and ply need liming wax instead. |
| Topcoat shapes the look | Oils such as Osmo or Rubio Monocoat preserve contrast, while a satin sheen usually beats gloss for keeping texture visible. |
| Prefer done-for-you finishing | Simmonsinteriorsupply offers bespoke cerused finishing with a sample panel before committing to a full commission. |
Table of Contents
- The history behind ceruse, liming, and limed oak
- Why oak works best, and which woods to avoid
- What you actually need to buy before you start
- Comparing the four cerusing methods
- A step-by-step paste filler recipe you can trust
- Fixing the problems that actually come up
- Working safely with old finishes and modern materials
- Choosing a topcoat that protects the look, not just the wood
- Where cerused oak earns its place in a room
- A maker's honest view on which method earns the effort
- Commission a bespoke cerused finish instead of gambling on a first attempt
- Frequently asked questions about cerused oak finishes
- Sources
The history behind ceruse, liming, and limed oak
Cerusing began as a practical fix rather than a design flourish. Sixteenth-century furniture makers rubbed white lead paste, ceruse, into oak grain partly to discourage rot and insect activity in an era before modern preservatives existed. The whitened pores were a side effect of a protective measure, and only later did that side effect become the point.
Terminology has muddled the picture ever since. "Ceruse," "liming," and "pickling" are often used as if they mean the same thing, and in casual conversation they broadly do, but there are real differences worth knowing before you start hunting for supplies. Ceruse traditionally referred to the lead-white paste itself. Liming described the use of actual lime putty, a caustic material that had to be handled carefully. Pickling is the loosest term, sometimes covering any pale wash applied to open-grained timber. Modern products have quietly retired the dangerous originals, and what you buy today, whether it is a titanium dioxide paste filler or a proprietary liming wax, owes its name to that history without carrying its risks.
The look endures because it does something few finishes manage: it makes texture visible rather than just implied. Design commentators have pointed to cerused oak's capacity to add depth and tactile warmth to a piece, which is why it moves comfortably between a rustic farmhouse table and a minimalist Scandinavian sideboard. Few finishes do both.
Why oak works best, and which woods to avoid
Oak's cellular structure is the entire reason this finish exists. Oak is ring-porous, meaning it grows large, open vessels concentrated in each growth ring, rather than distributing smaller pores evenly through the wood the way diffuse-porous species do. Those big open channels are exactly what catch and hold a contrasting pigment, which is why red and white oak remain the benchmark species for the technique.
Several other timbers share enough of that open structure to take a cerused finish convincingly:
- Ash has a grain pattern almost as pronounced as oak and takes pigment fill just as readily.
- Elm offers a wilder, more irregular grain that gives a looser, more rustic cerused look.
- Chestnut behaves similarly to oak and was a traditional alternative in regions where oak was scarce.
- Some mahoganies with open pore structures can work, though the effect is subtler than on oak.
Pine, most softwoods, and heavily burled or figured woods are poor candidates. Pine's pores are too fine and irregular to hold pigment cleanly, and burl grain is so busy that a contrasting fill just muddies the pattern rather than clarifying it.
Veneer and plywood need a different conversation entirely. Wire brushing is aggressive, and a veneer layer that might be little more than half a millimetre thick will not survive a wire wheel without burning through to the substrate beneath. If you are working with veneered furniture or ply panels, skip the brush and reach for a liming wax or a painted ceruse effect instead, both of which rely on surface application rather than mechanical grain-opening. Our wood species selection guide covers this in more depth, and if you are unsure whether a piece is solid or veneered, our comparison of veneer against solid wood construction is worth reading before you buy any filler at all.
What you actually need to buy before you start
A trip to a general DIY shed will leave you short of at least two items on this list, so it pays to plan the shopping properly. Here is what a UK-based project genuinely requires.
- Paste wood filler, ideally titanium dioxide based for the whitest possible result, applied over a sealed base coat.
- Powder or paste glaze, an alternative pigment carrier some finishers prefer for speed, though it is less forgiving to correct once applied.
- Liming wax or liming cream, such as Liberon Liming Wax, a wax-based product that gives a softer, less crisp highlight than paste filler.
- Water- or solvent-based stain for the base colour beneath the cerused layer.
- Sealer to lock in that base colour before the cerusing step, preventing the pigment from bleeding into the wrong areas.
- Topcoat, with oils such as Osmo or Rubio Monocoat Oil Plus 2C among the most commonly specified for this look.
- Abrasives ranging from coarse sanding grit for prep through to 000 steel wool for cleaning excess filler from the surface.
On tools, a stiff wire brush or a wire wheel fitted to an angle grinder opens the grain on solid oak, though a hand brush gives you far more control and less risk of gouging. You will also want a rubber squeegee for pressing paste filler into the pores, plenty of burlap or a Turkish towel for wiping back excess, and masking supplies if you are working near an area you do not want touched. Where filler leaves gaps or damage needs patching before you start, a product such as Ronseal wood filler is a reasonable general-purpose option, though it is not designed for the cerusing effect itself.
Buy small quantities of everything before committing to a full tin. Test the actual combination of stain, sealer, and filler you intend to use, and if any product carries a solvent base, check its safety data sheet against current COSHH guidance before you open the tin in an unventilated space.
Comparing the four cerusing methods
Each of the four routes to a cerused look trades off differently against control, speed, and forgiveness. None is universally "best." The right choice depends on the piece, your patience, and how much correction you can tolerate if something goes wrong.
| Method | Look and result | Difficulty and timing | Durability and topcoat | Suitable substrates | Safety notes |
|---|---|---|---|---|---|
| Paste wood filler | Crisp, bright white in the pores; the cleanest contrast available | Moderate difficulty; drying typically runs 1 to 4 hours before cleanup | Very durable once sealed; pairs well with oil or conversion varnish | Solid oak, quarter-sawn oak; not suited to thin veneer | Low toxicity in modern formulations; ventilate during solvent cleanup |
| Powder or paste glaze | Soft, slightly hazy contrast; can look uneven if rushed | Faster application but harder to judge; effect often invisible until topcoated | Good durability, though uneven fills are very difficult to correct after topcoating | Solid oak preferred; not recommended for veneer | Follow product SDS; some glazes carry stronger solvents |
| Liming wax or cream | Softer, more muted highlight than paste filler | Easiest method; usually dry and buffable within an hour | Lower durability, needs periodic reapplication as a wax finish | Works on solid oak, veneer, and ply | Generally low toxicity; still ventilate the workspace |
| Wire-brushed and stained | Textured, rustic contrast that relies on grain depth rather than pigment fill | Labour intensive brushing stage; stain dries per product, usually a few hours | Moderate; depends on the topcoat chosen afterwards | Solid oak only; wire brushing will destroy veneer | Wear a dust mask when brushing; fine wood dust is a respiratory irritant |
Paste filler suits furniture and cabinetry where you want a genuinely crisp result and are prepared to be patient. Powder and paste glaze suit production settings where speed matters more than perfect control, which is one reason shop and forum contributors tend to favour paste filler for one-off DIY pieces rather than glaze. Liming wax is the forgiving choice for floors, veneered furniture, or anyone nervous about an irreversible mistake. Wire-brushed and stained is best reserved for solid oak floors or cabinetry where the rustic, deeply textured look is the actual goal, not a side effect.
A step-by-step paste filler recipe you can trust
This is the method most likely to produce a result you are happy with on a first attempt, provided you resist the temptation to skip the test panel.
- Strip any existing finish. Sand back to bare wood if the piece has been previously varnished or waxed, working through progressively finer grits.
- Open the grain. Run a stiff wire brush along the grain direction on solid oak, applying even pressure. If the oak's grain is already pronounced, a lighter pass is enough. Vacuum thoroughly afterwards; leftover dust will contaminate the base stain.
- Apply your base colour. Choose a water or solvent dye that suits the contrast you want, dark walnut and ebony tones are popular choices behind a white cerused pore fill. Allow full drying per the product's instructions.
- Seal the base coat. A thin washcoat locks the base colour in place so the paste filler stage does not muddy or lift it.
- Mix and apply the paste filler. Whether using a commercial titanium dioxide filler or your own mix, press it into the grain with a rubber squeegee, working across the grain to force pigment into the open pores. Squeegee application gives you far more control than a brush at this stage.
- Let it set. Drying typically runs 1 to 4 hours depending on humidity and the specific product, and this stage rewards patience over speed.
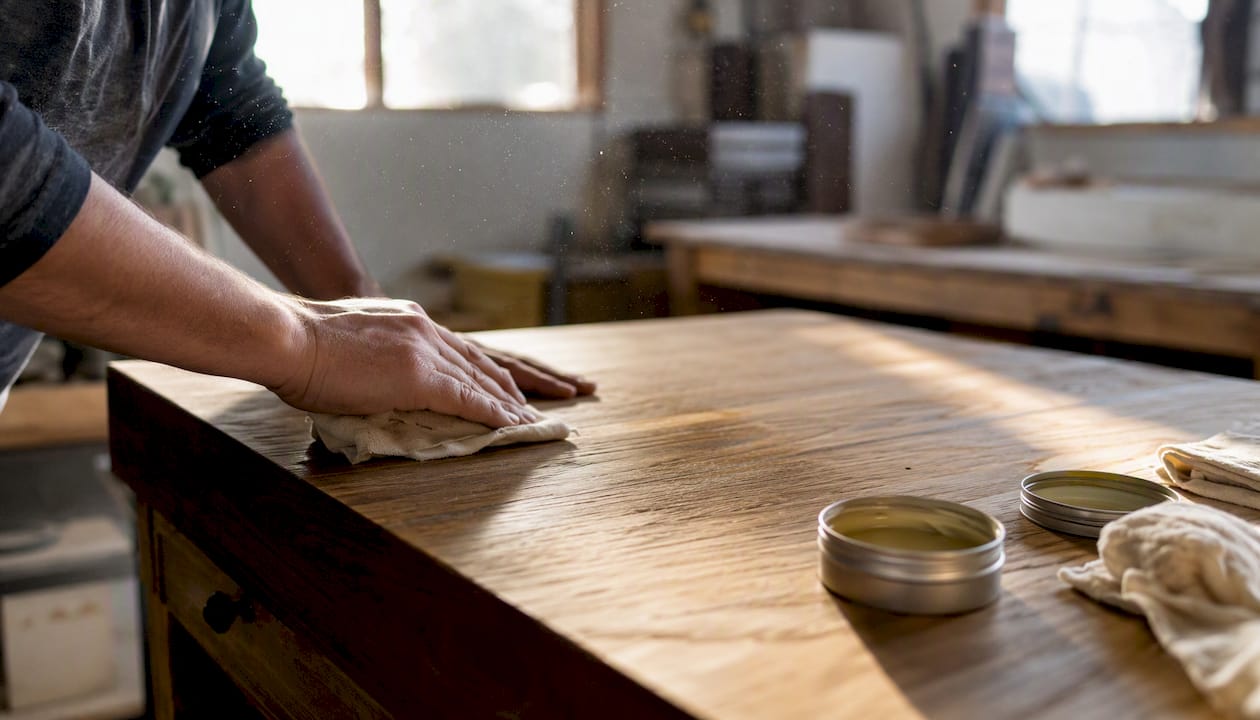
- Wipe back the excess. Use dry burlap or a Turkish towel first. If you need mineral spirits to help lift stubborn residue, apply it sparingly to the rag rather than the wood; a drenched rag will pull pigment straight back out of the pores and ruin the crisp fill you just created.
- Clean with 000 steel wool. A light pass removes any remaining haze from the surface without disturbing the pigment sitting in the grain.
- Apply your topcoat. Wipe-on oil, a conversion varnish, or a two-component oil such as Rubio Monocoat Oil Plus 2C will each preserve the contrast while adding durability. Follow the manufacturer's touch-cure timing before handling the piece.
Pro Tip: Always run the entire sequence, base stain through topcoat, on an offcut of the same batch of oak before you touch the actual piece. Grain density varies even within a single board, and what looks perfect on one test strip can behave differently a metre along the same plank.
Fixing the problems that actually come up
Most cerusing failures fall into a small number of predictable categories, and nearly all of them are fixable if you catch them before the topcoat goes on.
- A hazy, milky film across the surface usually means overfilling, too much paste left on the surface rather than confined to the pores. Sand back lightly and re-wipe with a barely damp rag.
- Patchy or thin pigment in some areas often traces back to over-wetting the cleanup rag with mineral spirits, which pulls colour straight back out of the grain it just filled. Reapply a light second coat of paste to the affected patch only.
- Gouged or torn grain on a veneered piece almost always means a wire brush was used where it should not have been. There is no fix beyond patching or refinishing; this is why veneer calls for liming wax rather than mechanical brushing in the first place.
- A result that looked fine before topcoat but disappoints after is a known risk with powder and paste glaze methods, where the final effect only fully reveals itself once sealed. This is precisely why a cured test panel, not just a dry one, matters so much.
- Blotchy topcoat absorption usually points to an incompletely sealed base coat. Give the sealer a full cure before moving on, and do not rush this step to save an evening.
Prevention comes down to three habits: test everything on scrap first, keep solvents to a minimum during cleanup, and check your timing against the product's stated drying window rather than guessing by touch.
Working safely with old finishes and modern materials
Anything with genuine age deserves caution before you sand, brush, or strip it. Historic ceruse relied on white lead, and older lime treatments sometimes involved genuinely caustic lime putty, so any antique piece with an unidentified white or pale finish should be treated as potentially hazardous until tested, never assumed safe because it looks decorative.
Before working on any older piece, run through this checklist:
- Test for lead using a proprietary lead paint test kit if the piece predates modern regulation, particularly anything inherited or bought second-hand with an unknown finish history.
- Check the SDS for any modern filler, glaze, or solvent product you plan to use, and follow current COSHH guidance on ventilation and exposure limits.
- Wear a respirator rated for organic vapours or fine dust, not just a basic dust mask, when sanding or wire-brushing for extended periods.
- Use nitrile gloves and eye protection throughout, especially during mixing and cleanup stages where splashes are common.
- Ventilate properly, ideally working with doors and windows open or using extraction, rather than relying on a single open window.
- Consider a professional conservator for anything of genuine historic or monetary value rather than risking it on a first attempt.
Modern paste fillers and liming waxes are formulated to avoid the lead and caustic lime that made historic cerusing genuinely dangerous, but "modern" does not mean "risk-free." Solvent-based sealers and stains still carry inhalation risks that deserve the same respect you would give any other workshop chemical.
Choosing a topcoat that protects the look, not just the wood
The topcoat you choose does more than protect the surface. It changes how the contrast reads, sometimes dramatically.
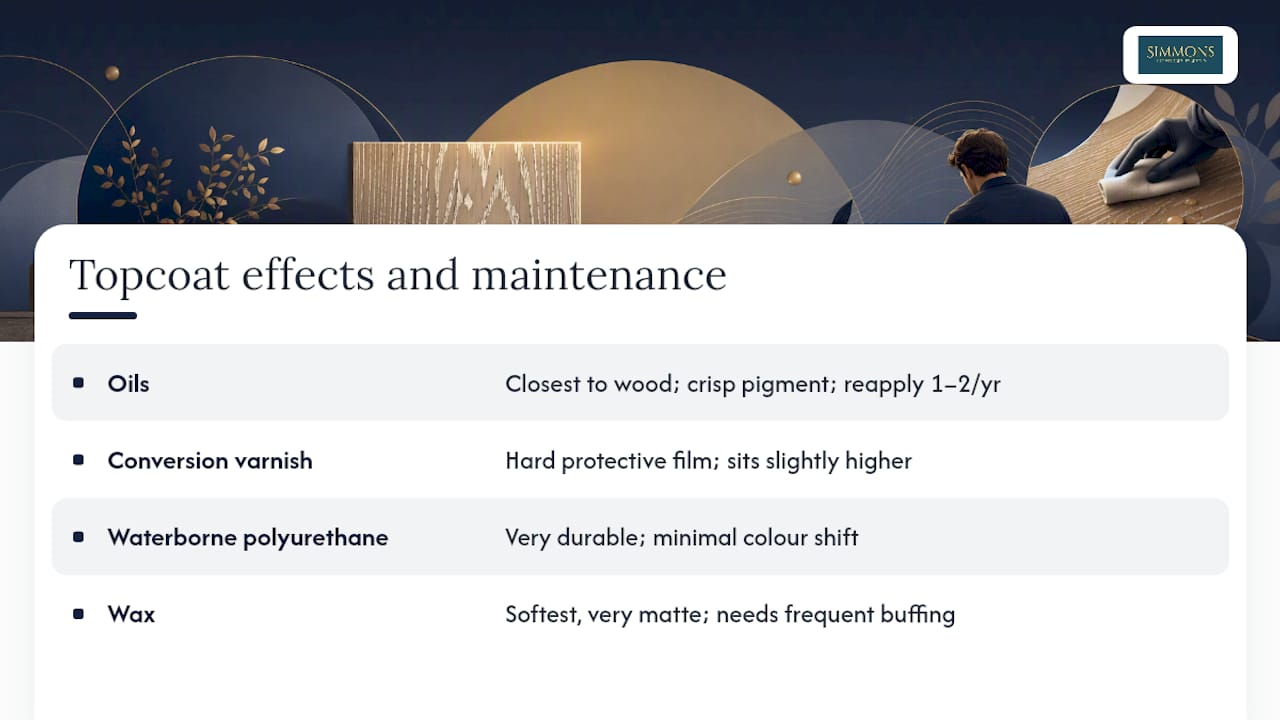
Oils such as Osmo and Rubio Monocoat Oil Plus 2C tend to sit closest to the wood, keeping the cerused pigment visually crisp while adding just enough sheen to deepen the grain's shadow lines. Conversion varnish builds a harder, more protective film and suits pieces that will see heavier daily use, though it sits slightly higher above the wood than an oil finish does. Waterborne polyurethane offers strong durability with minimal colour shift, a useful trait if you have worked hard to get a particular white-on-dark contrast and do not want a topcoat warming it up. Wax, whether applied alone or as a liming wax itself, gives the softest, most matte result of the group but needs the most frequent attention.
Sheen level matters more here than in most finishing work. A matte or satin sheen tends to preserve the sense of depth and texture that makes cerusing worth doing in the first place, while a high gloss finish can flatten that same contrast by bouncing light evenly across the surface rather than letting shadows sit in the grain. If you are choosing between matte and satin lacquer for a cerused piece, satin is usually the safer middle ground, offering a little more sheen than matte without sliding into the glassy look that undercuts the whole point of the technique.
Maintenance follows from whichever topcoat you picked. Oiled surfaces benefit from an occasional light reapplication, perhaps once or twice a year on a well-used table. Varnished and polyurethane surfaces need only gentle cleaning and should be re-topcoated only when scratches genuinely break through to bare wood. Waxed surfaces need the most frequent light buffing to keep their protective layer intact.
Where cerused oak earns its place in a room
Cerused oak reads as substantial without feeling heavy, which is exactly why it turns up in such varied settings. Statement dining tables, kitchen cabinetry, wall panelling, and coastal-inspired interiors all lean on the same underlying quality: a surface with enough visible texture to hold its own against plain painted walls or minimal decor.
The classic pairing remains a white or ivory cerused pigment against a dark base stain, usually walnut or near-black, because the contrast is at its most dramatic. That said, it is far from the only option. Grey-toned liming waxes suit a cooler, more contemporary palette, while coloured liming pastes, tinted rather than pure white, can shift the whole piece towards a warmer or more unusual register without abandoning the technique's core texture. The base stain you choose underneath does as much work as the pigment itself; a mid-brown base narrows the contrast for a subtler effect, while near-black maximises it.
Cerused oak also pairs well against certain materials in a finished room. Brushed or aged brass hardware tends to sit more comfortably against a limed surface than polished chrome does, and natural linen or boucle upholstery echoes the same tactile, slightly imperfect quality that makes the finish appealing in the first place. If you are specifying a piece for a project rather than building it yourself, browsing a completed gallery of bespoke work is a faster way to judge how a given contrast will actually read in a room than staring at a paint chip.
A maker's honest view on which method earns the effort
Ask ten finishers which cerusing method they prefer and you will get ten confident, slightly contradictory answers, which tells you something useful in itself: there is no single correct route, only the right route for a given piece and a given tolerance for risk. For bespoke furniture work specifically, paste filler earns its reputation. It is slower and less forgiving mid-process than a powder glaze, but you can actually see what you are getting before the topcoat goes on, which matters enormously when a client is involved and there is no room for an unpleasant surprise after sealing.
The powder and paste glaze methods have their place, particularly where speed matters more than absolute control, but the warning that their true effect only shows once topcoated is not a minor caveat. It is the single biggest reason DIYers get burned attempting glaze on a piece they cannot afford to redo.
If there is one habit worth stealing from professional workshops, it is the discipline of building a proper sample panel before touching the real piece. Try two or three base stain and pigment combinations side by side on offcuts from the actual timber you will be using, not a random scrap of similar-looking oak, and let them cure fully under the intended topcoat before deciding. Colour under a wet finish and colour under a cured one are rarely identical, and that gap catches out even people who have done this dozens of times before.
Commission a bespoke cerused finish instead of gambling on a first attempt
If reading through the wire-brushing, sealing, and steel wool stages has left you thinking this is a job better handed to someone with a workshop full of test panels, that instinct is worth trusting. Simmonsinteriorsupply builds bespoke, handcrafted furniture to order, and a cerused oak finish is exactly the kind of custom detail our artisans develop through sample panels before a single piece of client furniture is touched, so you see the real contrast on the real timber before committing to it.

Commissioning a piece includes a consultation on your base stain and pigment preferences, a sample panel finished in your chosen combination, an estimated lead time for the finished piece, and a choice of topcoat sheen from matte through to satin. Trade customers and interior designers can review completed work in our furniture gallery, and pieces such as our bespoke nest of coffee tables show how the finish sits on a smaller, more contemporary form. For larger fitted or architectural work, our partners at QueryTrade's carpentry network cover the fit-out side of a project alongside our furniture commissions. Get in touch through our bespoke enquiries page to request a sample panel in your preferred stain and pigment combination.
Frequently asked questions about cerused oak finishes
What is the difference between a cerused oak finish and white washed oak? White washed oak generally refers to a thinned white paint or wash applied across the entire surface, softening the wood's natural colour overall. A cerused oak finish is more targeted: the pale pigment sits specifically in the open pores while the surrounding wood keeps its base stain colour, creating a sharper, two-tone contrast rather than an overall pale wash.
Can you apply a cerused finish to oak veneer or plywood? Wire brushing to open the grain will damage thin veneer, so liming wax or a painted ceruse effect is the safer route on veneered or plywood surfaces. Solid oak is better suited to the paste filler and wire-brush methods described in this guide.
Is liming wax easier than paste wood filler for a first attempt? Yes. Liming wax is more forgiving and quicker to apply, though it gives a softer, less crisp contrast than a paste filler. Paste filler rewards patience with a cleaner, more defined result but has less margin for error during cleanup.
Does a cerused finish work with matte, satin, or gloss topcoats? Matte and satin sheens generally preserve the visible depth and contrast that make the finish worthwhile, while a high gloss topcoat tends to flatten that texture under an even reflective sheen. Satin is usually the most practical middle ground between protection and preserving the look.
How long does a full paste filler cerusing project take from start to finish? Allow at least a full weekend for a small piece once you include base stain drying, sealer curing, paste filler drying of roughly 1 to 4 hours, and topcoat cure time. Larger furniture or anything requiring multiple coats will take longer, and rushing any single stage is the most common cause of a disappointing result.
Sources
Several of the sources referenced throughout this guide are worth returning to directly if you want more detail on a specific stage of the process.
- How to Create a Cerused Wood Finish – Rubio Monocoat USA
- Cerused Oak Finish Tips
- Renew wood finishes with mineral spirits — BobVila
- What Is Cerused Oak? - Chairish Blog
Before working with any solvent-based filler, stain, or sealer, check the product's current safety data sheet and follow UK COSHH guidance on ventilation and personal protective equipment, particularly if you are stripping or sanding a piece of unknown age or finish history.