
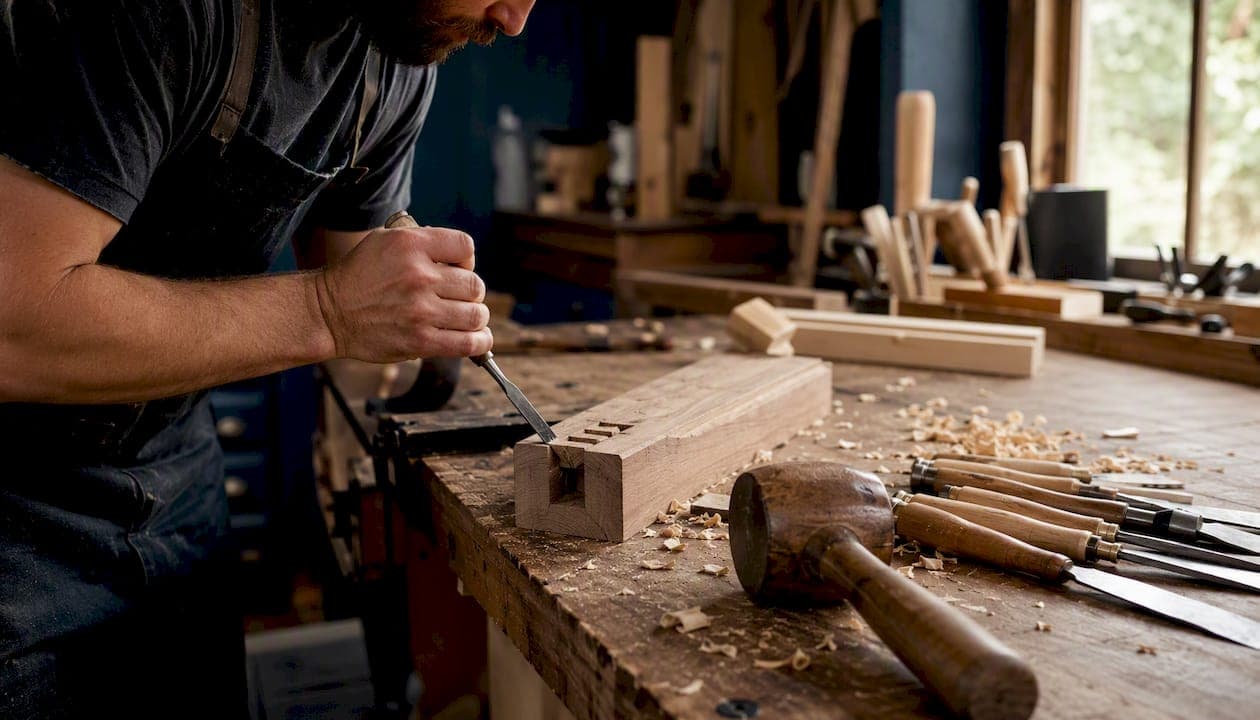
The principal furniture joinery types, and the one-line recommendation for each, are as follows. Butt joints are the simplest and weakest — always reinforce with dowels, biscuits or screws. Mortice and tenon is the foundational frame joint for chairs, tables and structural aprons. Dovetail (through or half-blind) is the definitive choice for drawers and fine boxes. Finger (box) joints offer an economical, strong alternative for carcass corners. Mitred corners suit decorative work where end grain must be hidden, but need spline or biscuit reinforcement. Dado and rabbet joints carry shelves and cabinet backs with excellent mechanical support. Tongue-and-groove locks panels and flooring runs. Biscuit and dowel joins align and reinforce edge glue-ups quickly. Spline joins add glue area to edge and mitre joints. Pocket-hole screws are the fastest option for face frames and non-visible assemblies. Lap joints are versatile mid-strength joints for frames and cross-members. Bridle joints suit open-frame corners and T-junctions. Drawbored pegged tenons create self-tightening structural joints that can be strong without relying on adhesive. Sliding dovetails lock shelves and dividers into carcass sides. Loose-tenon (Domino-style) joins offer mortice-and-tenon strength with machine speed.
Strength at a glance: mortice and tenon, dovetail and drawbored pegged tenon sit at the strong end; butt joints and mitred corners without reinforcement sit at the weak end. When in doubt, add a dowel, biscuit or spline to any joint that carries dynamic load.
Key takeaways
The strongest joint for a given task is always the one matched to its load, visibility and the tools available — not the most complex one.
| Point | Details |
|---|---|
| Mortice and tenon for frames | Size the tenon at one-third of stock thickness; drawbore for permanent mechanical tension in structural pieces. |
| Dovetail for drawers and boxes | Half-blind at the front face, through at the back; mechanical interlock resists pulling forces that glue alone cannot. |
| Biscuit or dowel for edge joins | Both provide alignment and moderate reinforcement quickly; condition timber to 8–10% moisture before jointing. |
| Dado and rabbet for shelving | Three-sided bearing surface gives mechanical support; cut fractionally undersized and pare to a snug fit. |
| Simmonsinteriorsupply for bespoke commissions | Handcrafted, made-to-order furniture built with the joinery methods above, customisable in size and finish for trade clients. |
Table of Contents
- 1. Structural and frame joinery: mortice and tenon, bridle and drawbored tenons
- 2. Corner and box joinery: dovetails, finger joints and mitred corners
- 3. Edge-joining and panel joints: butt, biscuit, dowel, spline and tongue-and-groove
- 4. Dado, rabbet and groove joints for carcasses and shelving
- 5. Mechanical and modern fastened joints: pocket screws, confirmat screws and knock-down fittings
- 6. How to choose the right joint for a furniture project
- 7. Tools, jigs and adhesives for furniture joinery
- 8. Common mistakes, failure modes and reinforcement strategies
- 9. Practical examples from a bespoke workshop: which joints are chosen and why
- 10. How wood species and material type affect your joint choices
- 11. Craft quality versus production speed: a perspective worth considering
- Bespoke joinery worth commissioning: what to ask and when to call a maker
- Sources
1. Structural and frame joinery: mortice and tenon, bridle and drawbored tenons
The mortice and tenon is the foundational joint of furniture making — used for thousands of years and still the first choice for chairs, table aprons, cabinet frames and any assembly that must resist racking. The joint works because a rectangular tongue (the tenon) fits snugly into a matching recess (the mortice), creating a large long-grain glue surface and a mechanical shoulder that resists lateral movement.
Variations and when to use them
Through tenon passes entirely through the leg or post and can be wedged for a decorative, permanent lock. Use it where the end grain is visible and celebrated, as in Arts and Crafts or Shaker-style pieces.
Stub (stopped) tenon stops short of the far face — the standard choice for table aprons and chair rails where a clean exterior is required.
Haunched tenon adds a small shoulder at the top of the tenon to fill a groove and prevent the joint twisting. Ideal for frame-and-panel doors and cabinet face frames.
Loose tenon (Domino-style) uses a separate floating tenon inserted into matching mortices on both parts. A Festool Domino or similar loose-tenon joiner cuts both mortices in seconds, giving near-identical strength to a traditional cut tenon with a fraction of the layout time. This is the method of choice in many contemporary bespoke workshops.
Fine Woodworking recommends sizing the tenon at a proportion of the stock thickness that balances tenon strength against mortice wall integrity. A tenon that is too thick leaves thin, fragile mortice walls; one that is too thin risks snapping under load.
Drawbored pegged tenon is a traditional technique where the peg hole in the tenon is bored slightly offset from the hole in the mortice walls. Driving the peg draws the tenon tightly home, creating permanent mechanical tension that can remove the need for adhesive entirely. It is the preferred method for structural dining tables and long-service hospitality furniture.
Bridle joint is an open mortice-and-tenon variant where the tenon slots into a U-shaped fork. Strong in tension and well suited to open-frame corners and T-junctions in chair backs and trestle bases.
Tools and workshop workflow
- Mortice chisels and mallet (hand method)
- Tenon saw or table saw with tenoning jig (tenon cheeks)
- Bench mortiser or plunge router with straight cutter and fence (mortice)
- Festool Domino or loose-tenon joiner (loose-tenon method)
- Marking gauge, square and sharp pencil for layout
| Joint type | Best for | Strength (racking/tension) | Difficulty / time | Typical uses |
|---|---|---|---|---|
| Standard mortice & tenon | Load-bearing frames | High | Moderate | Table aprons, chair rails, cabinet frames |
| Haunched mortice | Frame-and-panel doors | High | Moderate–high | Cabinet doors, face frames |
| Drawbored pegged tenon | Structural, long-service pieces | Very high | High | Dining tables, trestle bases, heritage restoration |
| Loose tenon (Domino) | Production or time-critical work | High | Low | Contemporary bespoke, fitted furniture |
| Bridle joint | Open-frame corners | Moderate–high | Moderate | Chair backs, trestle T-junctions |
2. Corner and box joinery: dovetails, finger joints and mitred corners
Corner joints define the character of a piece as much as its silhouette. The choice between a hand-cut dovetail and a mitred corner is partly structural, partly aesthetic — and partly a statement about the maker's values.
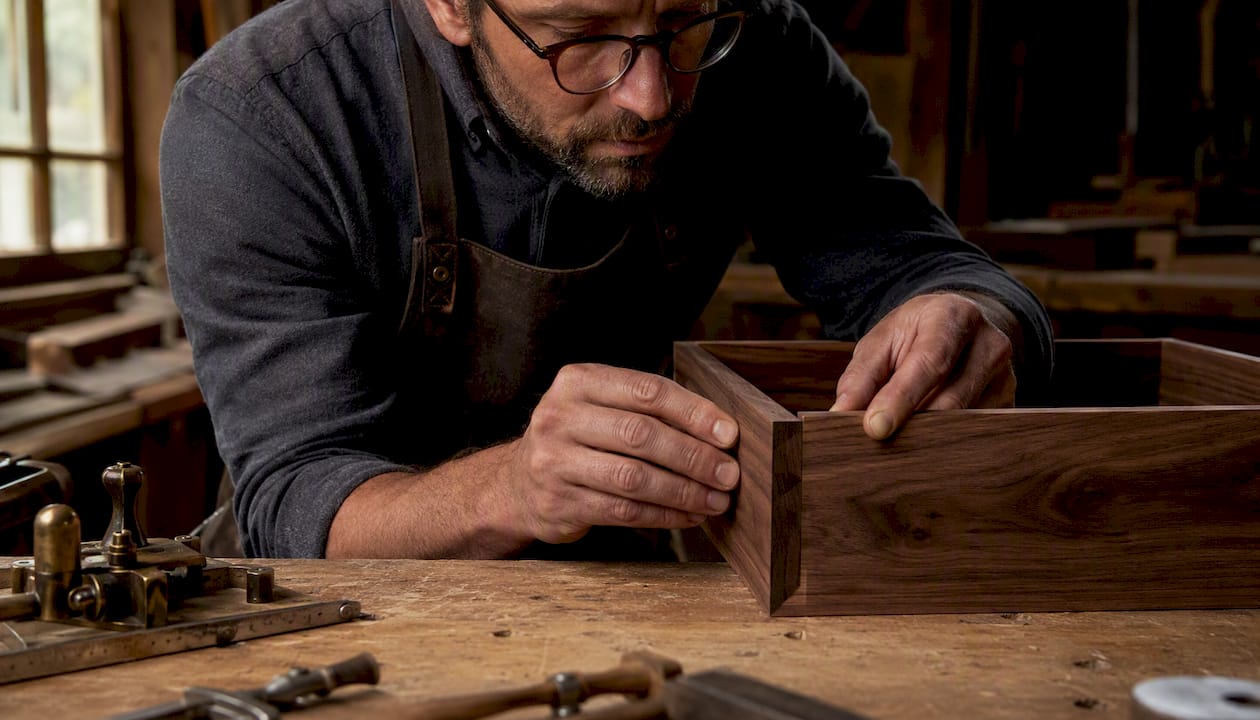
Through dovetail
The through dovetail exposes the interlocking tails and pins on the outside face, making it as decorative as it is strong. Dovetail joints provide high glue surface and mechanical interlock that resists pulling forces, which is why they have been the standard for drawer construction in fine furniture for centuries. The wedge geometry means the joint physically cannot be pulled apart along its primary stress axis — a property no amount of glue alone can replicate.
Pros:
- Exceptional resistance to racking and tension
- Large long-grain glue area
- Visually signals hand craftsmanship
Cons:
- Time-consuming to cut by hand; requires a dovetail saw, chisels and a marking gauge
- Jig-cut versions (Leigh, Axminster) are faster but less flexible in pin spacing
Half-blind dovetail
The half-blind dovetail hides the joint behind a thin face of material — the classic choice for drawer fronts where the joinery should be invisible from the front. A small shoulder of wood conceals the tails while the mechanical interlock remains intact behind it.
Finger (box) joint
The finger joint — also called a box joint — uses a series of uniform rectangular fingers that interlock at 90 degrees. It offers a very large glue surface and is considerably faster to cut than a dovetail, particularly with a table-saw jig or a router table and indexing pin. For painted or stained carcasses where the joint will not be prominently displayed, it is an excellent choice.
Pros:
- Very large glue area; strong in tension
- Fast to cut with a jig
- Economical on material
Cons:
- No mechanical interlock against pulling (relies entirely on glue)
- End grain visible on both faces — less refined in appearance than a dovetail
Mitred corners
A mitred corner hides all end grain, presenting a clean 45-degree line. The joint looks elegant but is inherently weak on its own — the glue surface is almost entirely end grain, which bonds poorly. Reinforcement is non-negotiable: a spline (a thin strip of wood or plywood glued into a saw kerf across the mitre), a biscuit, or a hidden dovetail key all add long-grain glue area and mechanical resistance.
Pro Tip: When cutting splines for a mitred corner, orient the spline grain perpendicular to the mitre line so the spline itself resists the joint opening. A spline with grain running parallel to the mitre adds almost nothing structurally.
3. Edge-joining and panel joints: butt, biscuit, dowel, spline and tongue-and-groove
Wide tabletops, cabinet sides and panelled doors all begin with the same challenge: joining narrow boards edge-to-edge into a stable, flat panel. The method you choose affects alignment precision, glue area, speed and long-term stability.
Comparing the main edge-joining methods
According to a comparative overview of joint types, biscuit and dowel joints provide acceptable strength and very rapid alignment compared with hand-cut mortice and tenon — a practical advantage when building wide panels under workshop time pressure.
| Method | Alignment help | Glue area added | Speed | Best for |
|---|---|---|---|---|
| Butt (glue only) | None | None | Very fast | Short-grain panels, veneered substrates |
| Dowel | Good | Moderate | Moderate | Edge joins, frame corners |
| Biscuit | Excellent | Moderate | Fast | Tabletops, carcass panels |
| Spline | Good | High | Moderate | Long runs, decorative edge detail |
| Tongue-and-groove | Excellent | High | Moderate | Flooring, panelling, concealed tabletop joins |
A plain butt joint with glue alone is the simplest approach and, on well-prepared long-grain surfaces, can be surprisingly strong, but it offers no alignment help and no mechanical resistance to the boards sliding during clamping. Dowels add both alignment and a little extra glue area; biscuits add excellent alignment and are forgiving of minor surface irregularities. A spline, routed into both edges, gives the largest additional glue area of the mechanical options and suits long tabletop runs particularly well.
Tongue-and-groove is the preferred method where a mechanical lock is needed alongside glue — solid wood flooring, wall panelling and concealed tabletop joins all benefit from the positive registration the tongue provides. On wide tabletops made from solid timber, leave the tongue-and-groove unglued at the outer boards to allow for seasonal movement.
Workshop advice for stable tabletops
- Prepare timber to 8–10% moisture content before jointing in a British workshop; allow boards to acclimatise for at least a week in the room where the piece will live
- Alternate growth-ring orientation (cup up, cup down) across adjacent boards to balance seasonal movement
- Apply glue to both faces of the joint; assemble within the adhesive's open time
- Use clamping cauls (straight-edged boards clamped across the panel) to keep the surface flat during glue-up
Pro Tip: Rub a little wax onto your clamping cauls before use. Glue squeeze-out will not bond to them, and you will save considerable time cleaning up.
For guidance on how timber species affects panel stability and movement, the wood species selection guide covers the key differences between oak, walnut, ash and other common British workshop timbers.
4. Dado, rabbet and groove joints for carcasses and shelving
Dado, rabbet and groove joints are the workhorses of cabinet and shelving construction. They are less celebrated than dovetails, but a well-cut dado is what keeps a bookcase shelf from sagging and a cabinet back from racking.
Definitions and typical uses
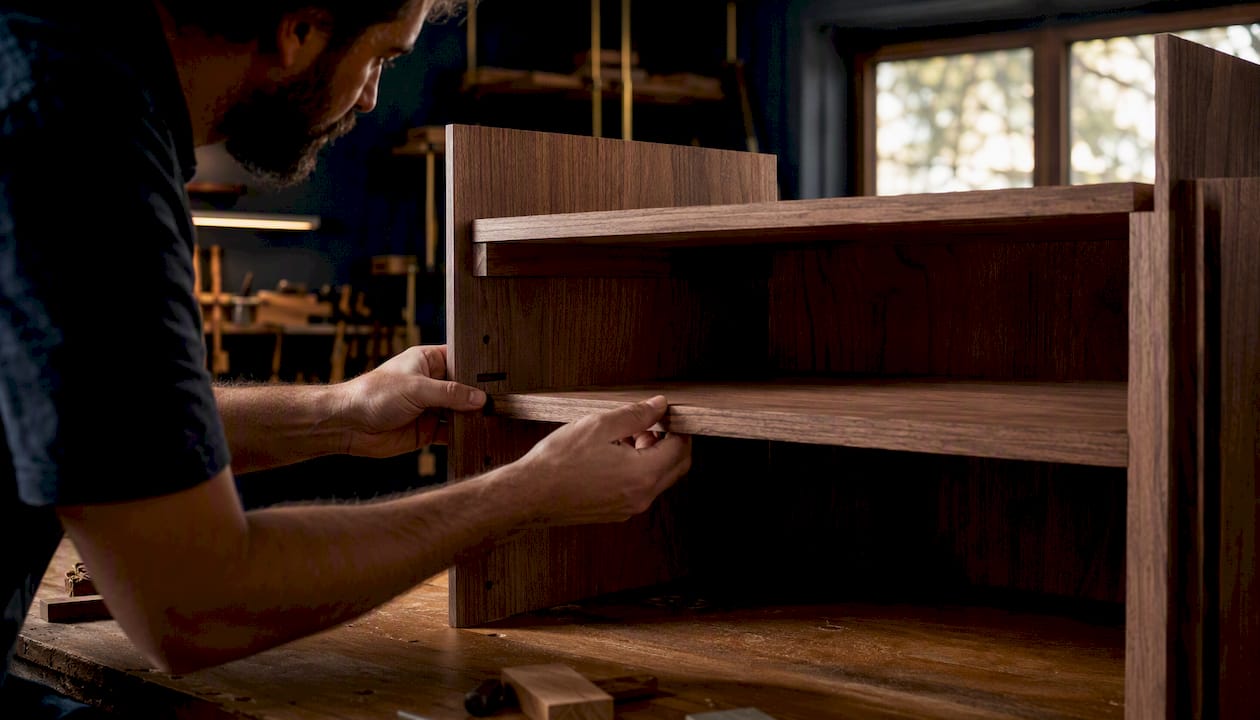
A dado (sometimes called a housing joint in British practice) is a channel cut across the grain of a board. A shelf or divider sits in it, supported on three sides. Dado joints provide a three-sided bearing surface that increases glue area and mechanical support, making them the standard choice for fixed shelving in bookcases, sideboards and kitchen cabinets.
A rabbet (rebate in British usage) is an L-shaped recess cut along the edge or end of a board. Cabinet backs sit in a rabbet routed around the inside of the carcass; drawer bottoms are similarly captured. The rabbet is an edge version of the dado — same principle, different position on the workpiece.
A groove runs with the grain rather than across it. Frame-and-panel construction uses a groove along the inside edge of the frame members to capture the floating panel.
Cutting dadoes and rabbets accurately
- Mark the shelf position with a marking knife and square — a knife line gives the router or saw a clean registration edge
- Use a table saw with a dado stack (two outer blades plus chippers) for fast, repeatable cuts; set the width to match the shelf thickness exactly
- A router with a straight cutter and a fence or guide rail gives clean results on assembled carcasses where a table saw cannot reach
- Test the fit on scrap before cutting the workpiece: the shelf should slide in with hand pressure, not rattle
Pro Tip: Cut dadoes fractionally undersized (by 0.2–0.3 mm) and pare to fit with a router plane or sharp chisel. A snug dado holds better than a loose one even before glue is applied.
Stopped dadoes — where the channel does not run the full width of the board — keep the joint invisible from the front of a cabinet. Stop the cut 12–15 mm short of the front edge and square the stopped end with a chisel.
5. Mechanical and modern fastened joints: pocket screws, confirmat screws and knock-down fittings
Not every joint needs to be cut from solid timber. Technical surveys of furniture manufacture list fastened joints and connectors as a recognised category alongside traditional interlocking joints — and in the right context, they are entirely appropriate.
Common fastened systems and their uses
- Pocket-hole screws (Kreg-style jigs): fast, strong in shear, ideal for face frames, cabinet carcasses and non-visible assemblies. The angled screw pulls the joint tight without clamping. Not suitable for joints under tension or where the screw head will be visible.
- Confirmat screws: large-diameter, coarse-thread screws designed for particleboard and MDF carcasses. Require a stepped pilot hole; provide good pull-out resistance in sheet materials where traditional joinery is impractical.
- Metal brackets and corner blocks: add shear resistance to butt joints; commonly used inside cabinet corners and under chair seats. Unobtrusive and easy to replace if the joint loosens.
- Knock-down (KD) fittings: cam locks, barrel nuts and cross-dowels allow furniture to be disassembled and reassembled. Appropriate for flat-pack, rental furniture and pieces that must be moved frequently.
Limitations to understand
Fastened joints resist shear well but perform poorly under tension — a pocket screw pulling a rail to a leg will hold under vertical load but can work loose under the racking forces a chair experiences with every use. They also fatigue over time in solid timber as the wood moves seasonally around the fixed metal fastener.
- Always pre-drill pilot holes to the correct diameter for the screw gauge — splitting is the most common failure mode.
- Select screw length so the tip engages at least 25 mm of solid material beyond the joint face.
- Use coarse-thread screws in softwood and MDF; fine-thread in hardwood.
- Countersink or counterbore screw heads so they sit flush or below the surface.
- In visible locations, plug counterbored holes with a matching timber plug or use a purpose-made cover cap.
The honest rule: use mechanical fasteners where speed, disassembly or sheet-material construction demands them, and use interlocking joinery wherever the piece must carry dynamic load or last a generation.
6. How to choose the right joint for a furniture project
Selecting the correct joint is a decision with five variables: load type, visibility, required strength, available tools and time, and seasonal movement. Work through them in order.
Decision checklist
- What is the joint's structural role? Frame joints (chair rails, table aprons) need mortice and tenon or bridle. Carcass corners need dovetail, finger joint or dado. Edge joins need biscuit, dowel or spline. Decorative corners need mitre with reinforcement.
- Will the joint be visible? Exposed joints invite dovetails and through tenons. Hidden joints allow pocket screws, biscuits or loose tenons.
- What load will it carry? Racking (chairs, tables) demands mortice and tenon or drawbored tenon. Tension (drawer fronts) demands dovetail. Shear (shelves) demands dado. Static compression tolerates a butt joint with reinforcement.
- What tools do you have? No mortiser? Use a plunge router with a fence. No dovetail saw? Use a router jig. No table saw? Use a biscuit joiner for edge joins.
- How much time is available? Hand-cut dovetails take hours; a biscuit joiner produces an aligned edge join in minutes.
Short decision flow
- Identify the joint's position: frame, carcass corner, edge join, shelf, or decorative corner.
- Assess the load: racking, tension, shear, or static compression.
- Check visibility: exposed or hidden.
- Match to joint family using the checklist above.
- If the ideal joint exceeds your tools or time, substitute: biscuit or dowel for mortice and tenon in non-structural cases; finger joint for dovetail in painted carcasses; pocket screw for dado in face-frame assemblies.
Quick substitutions when tools are limited:
- Mortice and tenon → loose tenon (Domino) or dowel joint
- Through dovetail → finger joint (for painted work) or router-jig dovetail
- Dado → rabbet-and-shelf-pin combination for adjustable shelving
- Mitred corner → mitred butt with biscuit reinforcement
7. Tools, jigs and adhesives for furniture joinery
Common joinery tools include chisels, hand saws, routers, biscuit joiners, dowel jigs and table saws — and a master craftsperson adds jigs for dovetail and finger joint production that take years to master. The list below covers what a well-equipped British workshop needs.
Essential hand tools
- Mortice chisels (6 mm, 10 mm, 12 mm): heavy-duty, for chopping mortices
- Bench chisels (full set): paring, fitting and cleaning joints
- Tenon saw (250–300 mm): ripping tenon cheeks and shoulders
- Dovetail saw (200 mm, 15–20 tpi): fine cuts for tails and pins
- Marking gauge and mortice gauge: scribing tenon thickness and mortice width
- Try square and sliding bevel: layout and angle checking
- Shoulder plane and router plane: fitting and cleaning joint shoulders
Essential power tools and jigs
- Plunge router with straight cutter: mortices, dadoes, rabbets, grooves
- Router table: finger joints, tongue-and-groove, rebates
- Biscuit joiner: edge joins and panel alignment
- Bench mortiser: fast, repeatable mortices in production work
- Table saw with dado stack: dadoes and rabbets
- Festool Domino (or equivalent loose-tenon joiner): fast mortice-and-tenon equivalent
- Dowel jig: accurate dowel alignment for edge joins and frame corners
- Dovetail jig (Leigh D4R or Axminster equivalent): router-cut dovetails and finger joints
Adhesive guidance
UK workshop moisture notes
Timber in a British workshop should be conditioned to 8–10% moisture content before jointing — the equilibrium moisture content for a centrally heated interior. Boards delivered from a merchant at 15–18% will move significantly as they dry; joint them too soon and the assembled piece will rack or crack. Store timber flat, stickered and away from external walls for at least two weeks before use. For veneer and solid wood stability comparisons, the differences in movement between species are worth understanding before committing to a joint type.
8. Common mistakes, failure modes and reinforcement strategies
Most joint failures in furniture trace back to one of five errors: poor layout, inadequate glue surface, wrong grain orientation, incorrect tenon sizing, or over-reliance on fasteners without adhesive.
Common mistakes
- Poor layout and marking: a mortice cut 1 mm off-centre weakens the wall on one side and creates a twisted assembly. Always use a mortice gauge set from the same face side.
- Inadequate clamping pressure: glue joints need even pressure across the full surface. Uneven clamping leaves voids that fail under load.
- Wrong grain orientation: cross-grain glue joints in wide panels will fail as the wood moves seasonally. Always join long grain to long grain.
- Incorrect tenon thickness: a tenon thicker than one-third of the stock leaves thin mortice walls that split; one thinner than one-quarter lacks the shoulder area to resist racking.
- Relying on fasteners without glue: pocket screws and confirmat screws fatigue over time in solid timber. Glue the joint wherever possible, even when using mechanical fasteners.
Failure modes and diagnosis
Racking failure shows as a joint that has rotated — the shoulder has opened on one side. The cause is usually insufficient tenon length or a mortice that is too shallow. Shear failure in a dado presents as a shelf that has dropped on one side; the dado was either too wide (loose fit) or the glue was not applied to both faces. A loose dowel or biscuit usually means the joint was assembled before the glue had adequate open time to wet both surfaces.
Reinforcement strategies
Pro Tip: Before reaching for a metal bracket, try drawboring a loose mortice-and-tenon joint. Drill a 6 mm hole through the mortice walls and tenon (offset by 1–1.5 mm toward the shoulder), then drive a slightly tapered peg. The joint pulls tight without disassembly.
- Dowels: add long-grain glue area and alignment to butt and edge joins
- Biscuits: fast alignment and moderate reinforcement for mitred corners and edge joins
- Splines: the strongest reinforcement for mitred corners; orient grain perpendicular to the mitre
- Drawboring: the traditional fix for a loose mortice-and-tenon without disassembly
- Metal corner blocks: add shear resistance inside cabinet corners and chair seats
- Pegs through tenons: through-wedged or drawbored pegs lock a through tenon permanently
Repair tips
For a loose chair joint in situ, inject thin cyanoacrylate (superglue) into the gap with a fine nozzle, clamp immediately and allow 30 minutes before loading. For a joint that has opened completely, clean both faces back to bare wood, re-glue with PVA or hide glue, and clamp square. Hide glue is preferable for antique or restoration work because it is reversible with warm water and does not interfere with subsequent finishing.
9. Practical examples from a bespoke workshop: which joints are chosen and why
Understanding furniture joinery types in the abstract is one thing; seeing how those choices play out in a commissioned piece is another. The following project notes illustrate the reasoning behind joint selection in bespoke workshop practice.
Dining table frame
A solid oak dining table with a trestle base presents one of the most demanding joinery briefs in furniture making. The top rails connecting the trestle legs carry both the weight of the top and the racking forces of everyday use. In this context, a drawbored mortice-and-tenon joint is the natural choice: the tenon is sized at one-third of the rail thickness, the mortice is chopped to a depth of 40 mm, and the peg is driven through an offset hole to pull the joint permanently tight. No glue is strictly necessary, though a thin coat of PVA is applied to the long-grain faces for insurance. The result is a joint that tightens with seasonal movement rather than loosening.
Sideboard drawer construction
A set of walnut drawers in a bespoke sideboard calls for half-blind dovetails at the front corners — the joint is invisible from the front face of the drawer but provides the mechanical interlock that prevents the front pulling away under load. The back corners use through dovetails, which are faster to cut and invisible when the drawer is closed. The drawer bottom floats in a groove routed along the inside of all four sides, unglued at the back, to allow for seasonal movement across the grain.
Nested coffee table carcass
A bespoke nest of coffee tables in a hospitality setting requires joints that are both strong and visually clean. The carcass corners use finger joints, which are cut on a router table with an indexing jig and finished with a hand plane to a tight, consistent fit. The shelf dadoes are stopped 15 mm from the front edge so no joint is visible from the front. Loose-tenon joints connect the legs to the top frame, giving mortice-and-tenon strength with the precision and speed a production run demands.
Commissioning tips for trade clients
Pro Tip: When commissioning bespoke furniture, ask the maker specifically which joints are used at the frame corners and drawer fronts. A maker who answers "pocket screws" for a chair frame or "staples" for a drawer front is telling you something important about the longevity of the piece.
- Ask whether mortice-and-tenon or loose-tenon joints are used for structural frames
- Confirm that drawer fronts use half-blind dovetails or equivalent interlocking joints
- Ask about moisture content at the time of jointing and how the timber was conditioned
- Enquire about reinforcement methods: are pegs, splines or corner blocks used where appropriate?
- Clarify the adhesive used and whether joints are reversible (relevant for antique-style or restoration commissions)
Why does this matter for hospitality and residential commissions? A hotel dining chair endures far more racking stress in a year than a domestic chair does in a decade. Joint choice is not a detail — it is the primary determinant of whether a piece survives a commercial environment or requires costly repair within two years.
Author: Luke, Simmonsinteriorsupply
10. How wood species and material type affect your joint choices
The same joint cut in two different timbers can perform very differently. Wood species selection affects not just the aesthetics of a piece but the mechanics of every joint within it.
Dense hardwoods (oak, ash, walnut, hard maple) hold mortice walls well and resist splitting around tenon shoulders. They are forgiving of tight fits and reward hand-cut joinery. Dovetail pins in oak are crisp and durable; the same pins in a soft, open-grained timber like pine will compress and loosen over time.
Softwoods (Scots pine, Douglas fir, spruce) are more compressible and prone to crushing under clamping pressure. Tenon thickness should be increased slightly relative to the one-third guideline, and dowels should be a close fit rather than a press fit to avoid splitting the grain around the hole.
MDF and particleboard have no grain and no long-grain glue surface. Traditional interlocking joints are largely ineffective — the material crumbles around a mortice and offers poor screw pull-out in the face. Confirmat screws, cam locks and biscuits are the appropriate fastening methods, with edge banding to protect exposed faces.
Plywood is dimensionally stable and holds screws well in its face. Dado and rabbet joints work excellently in plywood carcasses; the alternating grain layers resist splitting and hold glue reliably. Avoid cutting dadoes too close to the edge of a ply panel, where the outer veneer layers can delaminate.
Engineered timbers (LVL, glulam) are dimensionally stable and suit loose-tenon and dowel joinery well. Their consistent density makes machining predictable, though adhesive compatibility should be checked before gluing.
For pieces that combine solid timber with veneered board — a common approach in bespoke furniture — the joint at the transition point needs careful thought. A solid timber apron tenoned into a veneered leg will move differently from a fully solid assembly; allow for that movement in the joint design rather than fighting it with glue.
11. Craft quality versus production speed: a perspective worth considering
There is a conversation in furniture making that never quite resolves itself: when does the hand-cut joint justify its time, and when is a machine method the wiser choice? The honest answer is that it depends entirely on what the piece is asked to do and how long it is expected to last.
A drawbored mortice-and-tenon joint in a dining table frame will outlast the table's finish, its hardware and quite possibly its owners. A pocket-screw face frame in a painted kitchen cabinet will serve its purpose for decades without anyone noticing or caring. The mistake is applying the wrong standard to the wrong context — spending three hours hand-cutting dovetails in a carcass that will be painted and hidden inside a wardrobe, or saving time with pocket screws in a chair that will carry 100 kg of dynamic load every day.
Sustainability is also part of this calculation. A piece built with traditional interlocking joinery and reversible hide glue can be disassembled, repaired and refinished indefinitely. A piece held together with confirmat screws and polyurethane glue is largely unrepairable when it fails. For clients who value longevity and responsible sourcing — and the FSC certified furniture conversation is increasingly part of every trade brief — the joint choice is a sustainability choice as well as a structural one.
The craft is not in the difficulty of the joint. It is in choosing the right joint for the right reason, and executing it with the precision the piece deserves.
Bespoke joinery worth commissioning: what to ask and when to call a maker
When a project demands structural integrity, a matched set across multiple rooms, or a finish that must hold up in a commercial environment, commissioning a bespoke maker is the sensible path rather than the indulgent one.

Simmonsinteriorsupply collaborates with skilled artisans to produce handcrafted furniture built around the joinery methods this article describes — mortice-and-tenon frames, half-blind dovetail drawers, stopped dado shelving and loose-tenon carcasses, all conditioned and finished to the moisture and movement standards a British interior demands. Every piece is made to order, customisable in size and finish, and designed to serve trade clients, interior designers and hospitality procurement teams who need furniture that performs as well as it looks.
Before requesting a quote, ask your maker these questions:
- Which joint types are used at the frame corners and drawer fronts?
- What moisture content is the timber jointed at, and how is it conditioned?
- Are structural joints reinforced with pegs, splines or corner blocks?
- What adhesive is used, and are joints reversible for future restoration?
- What is the lead time, and does the piece carry a structural warranty?
To see finished work and explore the range, visit the Simmonsinteriorsupply gallery or request a bespoke commission directly.
Sources
- Furniture Joints - Overview | Axminster Tools
- Wood Joinery Basics | Family Handyman
- 18 Types of Woodworking Joints and When To Use Them | The Spruce
- Mortise and tenon - FineWoodworking
- The indispensable mortise-tenon | Popular Woodworking
- Taxonomy of wood joints and methods (UiTM technical paper)