
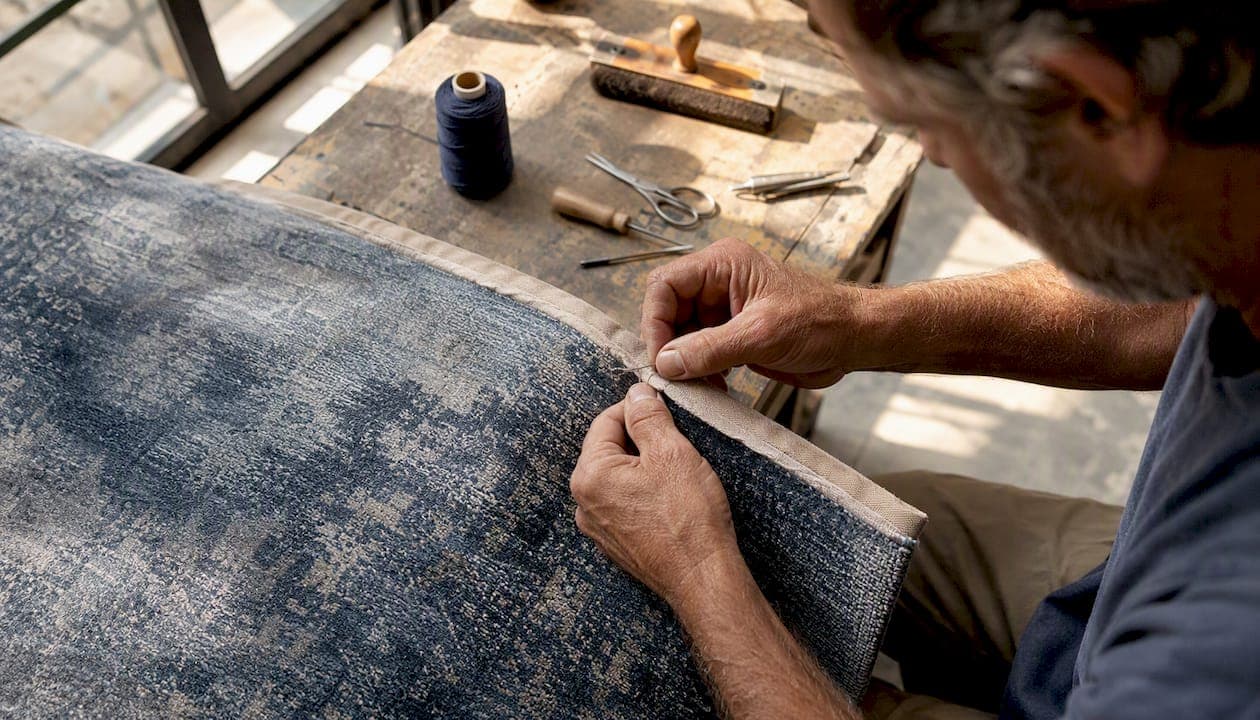
The five principal rug border options are binding, serging, self-edge, fringing, and piping or corded borders. Each suits a different combination of rug construction, room use, and aesthetic intent. For high-traffic hallways and family rooms, binding is typically the most cost-effective and durable choice; for a fine wool or high-pile rug destined to anchor a drawing room, serging delivers a more refined, seamless finish. Natural-fibre rugs in sisal or jute often carry wide cotton or linen binding beautifully, turning a practical edge into a deliberate design frame.
The single most important action before committing to any finish is to order physical swatches or sample corners and hold them against your rug pile in the room's natural light. Colour temperature shifts dramatically between a supplier's studio and a north-facing sitting room, and a border that reads as warm ivory on screen can appear stark white against a stone-coloured wool pile.
- Binding: folded fabric tape stitched around the edge; widths typically range from narrow to wide options; most economical.
- Serging: yarn overlocked continuously around the raw edge; rounded, tailored look; preferred for wool and plush piles.
- Self-edge: factory-finished or turned edge with no added trim; cleanest look on flat-weave and low-pile rugs.
- Fringing: structural on hand-knotted rugs; decorative on machine-made; requires careful vacuuming.
- Piping/corded: a raised, inset cord that adds a tailored, upholstered quality to the rug's perimeter.
Pro Tip: Always measure your raw cut size first, then add the border allowance on all four sides. A wide binding on a rug adds several centimetres to each finished dimension, so the final size will be larger than the raw cut size. Confirm the final size with your workroom before cutting.
Key takeaways
Binding suits high-traffic rooms and low-pile rugs; serging is the preferred finish for wool and high-end pieces; and border width always changes the rug's finished dimensions, so calculate before you cut.
| Point | Details |
|---|---|
| Match method to pile | Use binding for low-pile and commercial rugs; choose serging for wool, high-pile, or focal pieces. |
| Material follows room use | Cotton and linen suit living rooms; faux leather and Sunbrella perform better in high-traffic or outdoor-adjacent spaces. |
| Border width changes scale | A wide border reduces visible pile area and alters finished dimensions; calculate the finished size before ordering. |
| Order swatches first | Always request sample corners and confirm stitch type and colour under natural light before committing to a full commission. |
| Simmonsinteriorsupply for bespoke | Simmonsinteriorsupply offers custom widths, blind stitching, hand-serging, leather, and Sunbrella borders with trade account support. |
Table of Contents
- What are the main rug border finishing methods?
- Which border materials work best in UK homes?
- How do you choose the right border for your rug and room?
- What does the finishing and installation process involve?
- How do you care for different border types?
- How do you measure and order the right border?
- How does Simmonsinteriorsupply support bespoke borders and trade clients?
- Why the border is the decision most designers leave too late
- Simmonsinteriorsupply: bespoke borders crafted to your exact brief
- Sources
What are the main rug border finishing methods?
Understanding the difference between each finishing method is the foundation of every good border decision. The industry term for the category is rug edge finishing, and the five methods below cover the full range from purely functional to deliberately decorative.
Binding
Binding uses a folded strip of fabric, most commonly polyester or cotton tape, wrapped tightly around the raw edge and stitched in place. It is the least expensive and most widely available finishing method, which makes it the natural starting point for budget-conscious projects and for rugs that will see heavy daily use. A narrow ¾" binding sits almost invisibly at the edge; a wide 2¼" binding in a contrasting linen or leather becomes a visible design statement, framing the rug much as a mount frames a print.
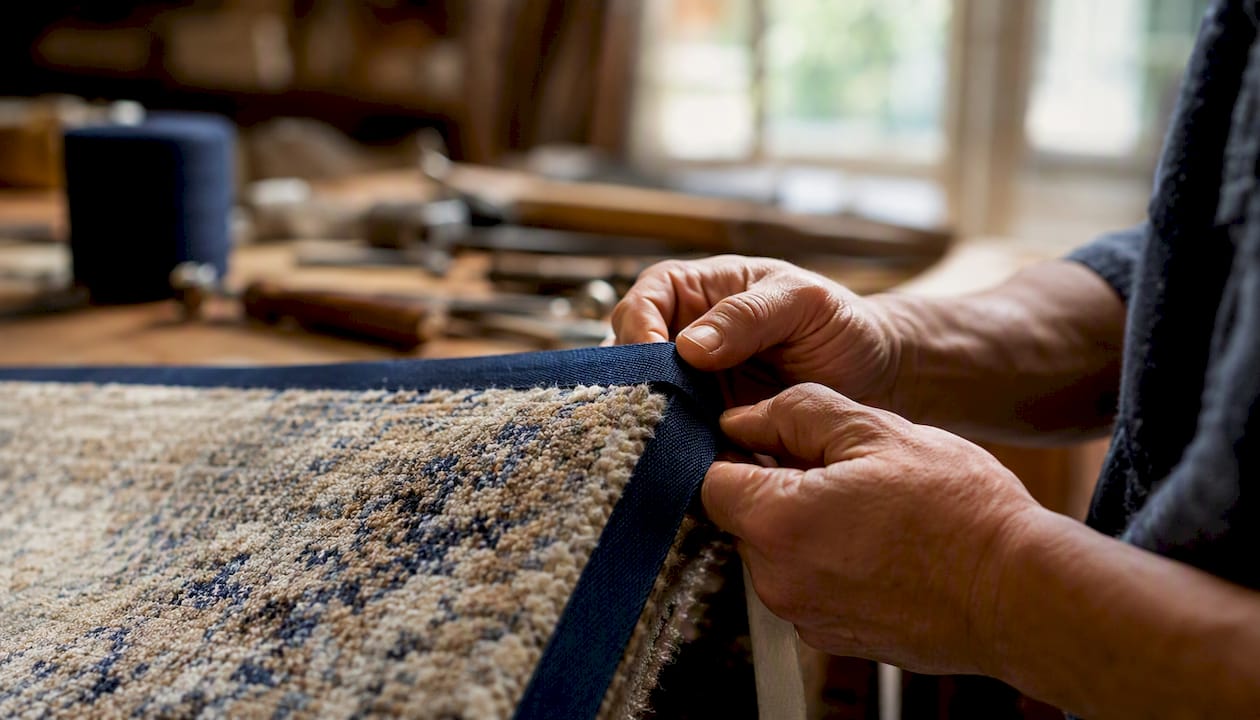
Binding adheres reliably to low-pile and commercial loop carpets. On thick wool or plush piles, the tape can struggle to grip the backing evenly, which is where serging earns its place.
Serging
Serging wraps yarn continuously around the rug's raw edge, producing a rounded, almost sculptural finish that sits flush with the pile rather than sitting on top of it. The result reads as more refined and factory-like than binding, and it is the preferred choice for wool rugs, hand-tufted pieces, and any rug intended as a focal point. It typically costs more than binding, and hand-serging or blind stitching adds further to the labour cost, but the elevated finish is worth the investment when the rug is the room's centrepiece.
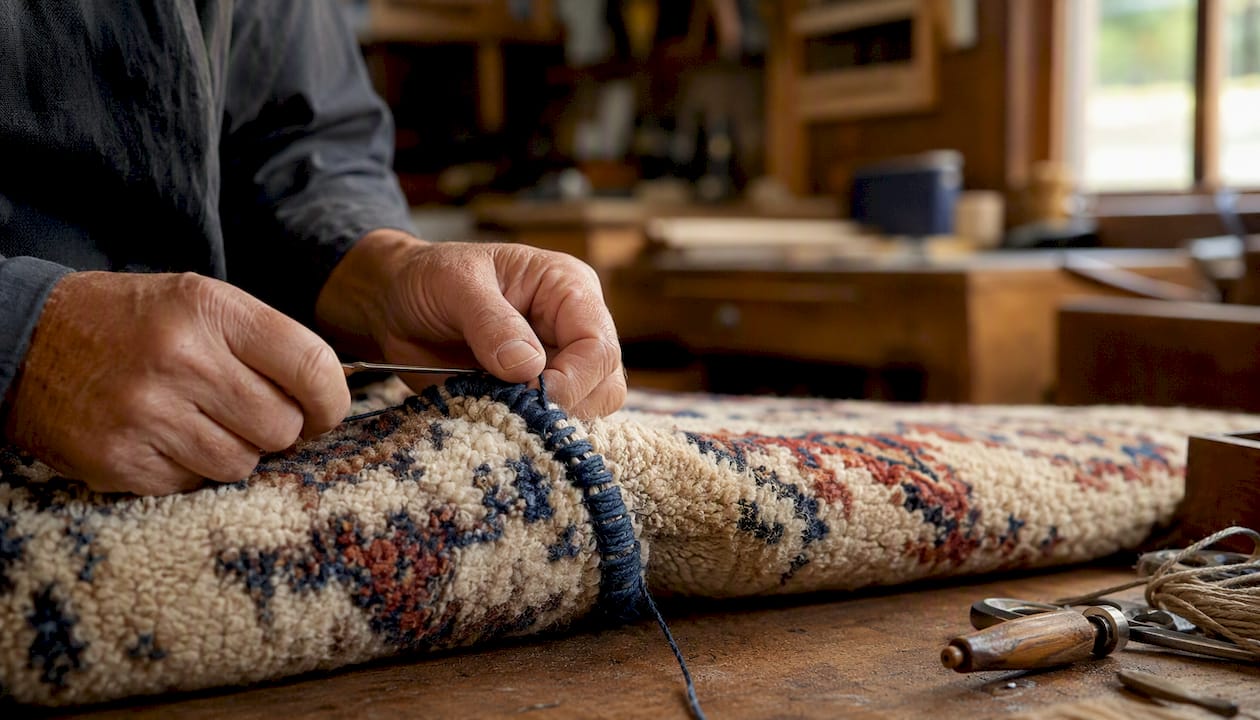
Self-edge and minimal edge
A self-edge uses the rug's own woven or tufted structure as the finish, either by turning the backing under or by relying on a factory-sealed edge. It suits flat-weave rugs, kilims, and low-pile synthetics where the construction is tight enough to hold without additional reinforcement. There is no added material cost, and the look is clean and contemporary, though it offers little protection against fraying on looser constructions.
Fringing
On a hand-knotted rug, fringe is not decorative at all. It is the structural end of the warp threads, and removing or replacing it can compromise the rug's integrity. On machine-made rugs, fringe is sewn on as a purely aesthetic addition, which means it can be removed or swapped without structural consequence. Fringe complicates vacuuming and cleaning, particularly in households with pets or young children, so weigh the visual appeal against the maintenance commitment honestly.
Piping and corded borders
A piped or corded border introduces a raised, upholstered quality to the rug's perimeter, borrowing a technique more commonly associated with cushions and sofas. A cord is encased in fabric and stitched along the edge, creating a subtle three-dimensional line that reads as tailored and considered. It suits rugs in formal reception rooms or bedrooms where the rug is part of a layered, designed scheme rather than a purely functional floor covering.
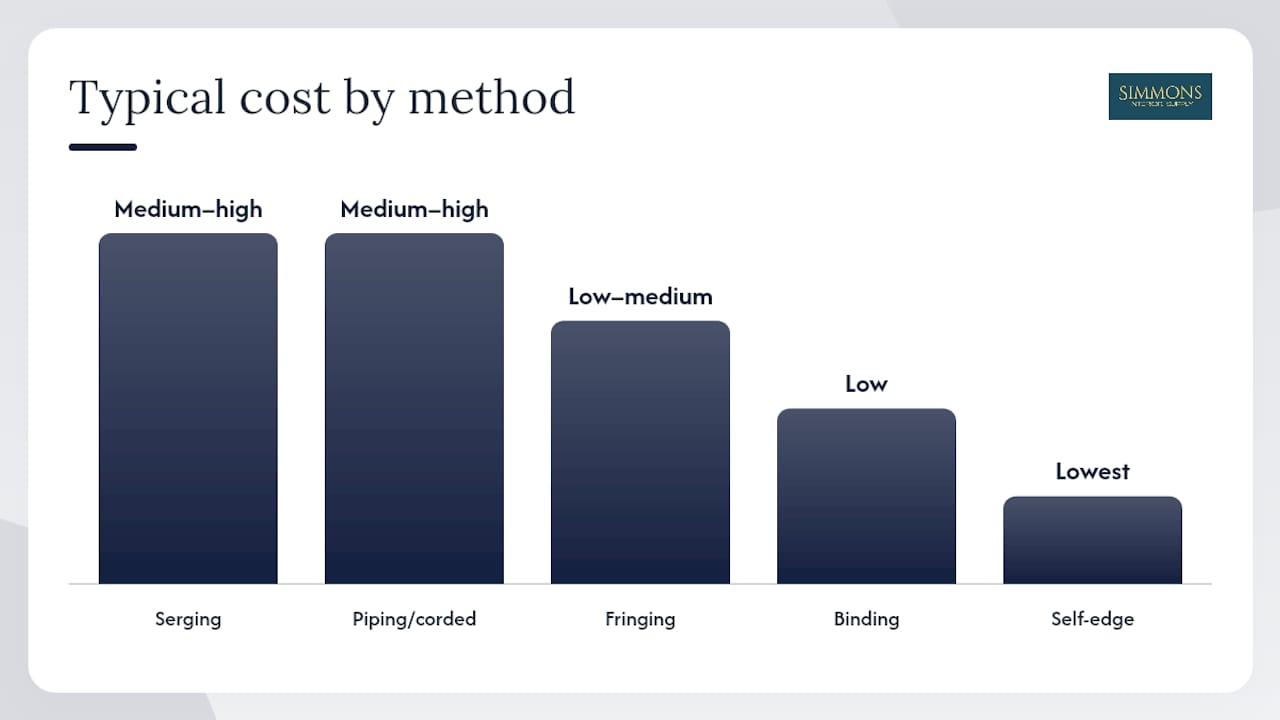
| Method | Typical cost | Best for | Durability |
|---|---|---|---|
| Binding | Low | High-traffic, low-pile, budget projects | High |
| Serging | Medium–high | Wool, high-pile, focal rugs | High |
| Self-edge | Lowest | Flat-weave, kilim, tight low-pile | Medium |
| Fringing | Low–medium | Hand-knotted (structural), decorative on machine-made | Medium |
| Piping/corded | Medium–high | Formal rooms, upholstered aesthetic | Medium |
Which border materials work best in UK homes?
Material choice shapes not just the look of a border but its long-term performance. Wide cotton binding creates a framed look, leather borders give a structured modern aesthetic, and outdoor fabrics such as Sunbrella suit busy or external environments. Here is how the main options compare.
- Cotton: soft, breathable, and available in a wide range of colours. Suits living rooms and bedrooms. Prone to soiling in high-traffic areas; machine-washable on lighter rugs. Works with most pile types and is the standard choice for binding tape.
- Linen: slightly coarser texture than cotton, with a natural, organic quality that pairs beautifully with jute, sisal, and natural-fibre rugs. Less colour-fast than cotton; best in lower-traffic, drier rooms.
- Leather: structured, durable, and unmistakably luxurious. Suits contemporary and mid-century schemes. Requires conditioning to prevent cracking; not ideal in rooms with direct sunlight unless UV-treated.
- Faux leather: the practical alternative to full-grain leather. Easier to wipe clean, more UV-stable, and considerably less expensive. A sound choice for family rooms and hallways where a polished look is wanted without the maintenance overhead.
- Polyester/synthetic tape: the workhorse of the binding world. Colourfast, durable, and resistant to moisture. Aesthetically neutral rather than beautiful, but entirely appropriate for utility spaces, stair runners, and outdoor-adjacent areas.
- Sunbrella and UV-stabilised outdoor fabrics: purpose-built for external use and busy interiors. Resistant to fading, moisture, and mildew. The material of choice for conservatory rugs, outdoor terraces, and any space that sees significant sunlight or humidity.
Material compatibility matters. Binding works well on low-pile and commercial loop carpets, while serging is preferred for thick wool or plush rugs where tape adhesion can be problematic. Linen and cotton binding tape suits sisal and jute rugs particularly well because the natural fibres share a similar visual weight. Leather borders tend to be applied to flat-weave or low-pile rugs where the stiff edge can be stitched cleanly without buckling.
| Material | Durability | Aesthetic feel | Maintenance | Cost band |
|---|---|---|---|---|
| Cotton | Medium | Classic, versatile | Low | Low |
| Linen | Medium | Natural, organic | Low–medium | Low–medium |
| Leather | High | Structured, luxurious | Medium | High |
| Faux leather | High | Modern, polished | Low | Medium |
| Polyester tape | Very high | Functional | Very low | Low |
| Sunbrella/outdoor | Very high | Contemporary | Very low | Medium |
Pro Tip: Order at least two material samples and lay them against the rug pile in the room where it will live. Check them at midday in natural light and again under your evening artificial lighting. The difference can be striking, and it takes less than five minutes to avoid a costly mistake.
For further guidance on pairing border materials with furniture finishes, the wood species selection guide for interior designers offers a useful framework for thinking about material harmony across a scheme.
How do you choose the right border for your rug and room?
A good border decision follows a clear sequence. Work through these steps before contacting a workroom or placing a sample order.
- Identify your rug's fibre and pile height. Wool and high-pile rugs suit serging; low-pile synthetics and natural fibres suit binding. A damaged or loose backing should be repaired before any finishing is applied.
- Assess room traffic and cleaning frequency. Hallways, children's rooms, and kitchens demand durable, easy-clean materials such as polyester binding or faux leather. A formal sitting room can carry the more delicate linen or leather border it deserves.
- Decide your visual intent. Do you want the border to frame the rug as a picture frame frames art, or to blend quietly into the pile? Wide, contrasting binding frames; narrow serging in a matching yarn blends.
- Set your budget. Binding is the most economical finish; hand-serging and blind stitching are at the premium end. The rug binding vs serging decision frequently comes down to budget, material, and desired aesthetic.
- Choose your corner style. Mitered corners produce a clean 45-degree join and look more refined; lapped corners are simpler and slightly more robust. Mitered corners typically cost a little more in labour.
- Confirm your stitch type. Blind (hidden) stitching conceals the thread entirely for a seamless finish; top-stitching is visible and can itself become a design detail in a contrasting thread colour.
When speaking to a supplier, ask specifically about sample lead times, whether blind stitching is available on your chosen material, and how the border width will affect your final rug dimensions. A rug size guide is worth consulting before you finalise measurements, particularly if the rug needs to sit correctly under furniture.
Pro Tip: A wider border makes a rug appear smaller in the room because it reduces the visible pile area. If you are working with a generous cut size, a 2" border can actually improve the rug's proportions by giving it a more considered, framed quality. If the room is compact, keep the border narrow.
What does the finishing and installation process involve?
Finishing a rug edge is a craft process, not simply a mechanical one. Here is what a professional workroom typically does, and what you should expect at each stage.
- Trimming and squaring. The raw rug is trimmed to the exact cut size, with corners squared precisely. Any unevenness at this stage will telegraph through to the finished border.
- Backing stabilisation. If the backing is loose, damaged, or likely to fray, it is reinforced before any edge treatment is applied. Confirming backing condition before finishing is an established best practice; skipping this step is one of the most common causes of early border failure.
- Binding or serging. The chosen material is applied around the perimeter. Machine binding is faster and suits high-volume or commercial projects; hand-serging is slower, more labour-intensive, and produces a noticeably superior finish on fine rugs.
- Corner treatment. Mitered corners are cut and folded at 45 degrees before stitching; lapped corners fold one edge over the other. Mitered corners require more skill and time but produce a cleaner result.
- Blind or top-stitching. Blind stitching hides the thread beneath the border material; top-stitching leaves it visible. Blind stitching is a premium, labour-intensive option that adds to both cost and perceived quality.
- Blocking, pressing, and final inspection. The finished rug is pressed flat, checked for even tension around the border, and inspected for any loose threads or uneven corners before despatch.
How border width changes your finished dimensions. A border is applied around the raw cut size, so it adds to the overall measurement. A 1¼" border on all four sides adds 2½" to both the length and the width of the finished rug. Always confirm the finished size with your workroom before the raw rug is cut, and cross-reference against your room plan.
Standard machine-bound rugs can often be turned around in a few working days. Hand-serged or blind-stitched finishes typically require one to two weeks, and bespoke leather or Sunbrella borders on large-format rugs may require longer. Build this into your project timeline, particularly for hospitality or staged interior projects with fixed completion dates.
Pro Tip: When your finished rug arrives, check the border tension before unrolling it fully. Run a finger along each edge: the binding or serging should feel evenly taut with no puckering or loose sections. Check all four corners for clean joins. If anything looks uneven, flag it with the workroom immediately rather than waiting until the rug is laid.
How do you care for different border types?
A border that is beautifully chosen and expertly applied will still deteriorate quickly without the right maintenance. The approach varies by material.
- Cotton and linen binding: vacuum gently along the border with a low-suction setting, avoiding the beater bar. Spot-clean with a mild upholstery cleaner and a damp cloth; blot rather than rub. Professional cleaning is advisable once a year for rugs in regular use.
- Leather and faux leather borders: wipe with a barely damp cloth to remove surface dust. Condition genuine leather borders two to three times a year with a leather conditioner to prevent cracking. Keep leather-bordered rugs out of prolonged direct sunlight; UV exposure causes fading and brittleness over time.
- Serged yarn edges: vacuum carefully along the serged edge, moving in the direction of the yarn wrap rather than against it. Avoid catching the yarn on a beater bar. Loose threads should be trimmed rather than pulled.
- Outdoor and Sunbrella borders: wipe down with a damp cloth and mild soap. These materials are designed to resist moisture and UV fading, but a periodic rinse removes accumulated grit that can abrade the fibres over time.
- Fringe: vacuum fringe by hand or with a soft brush attachment, always working from the base of the fringe outward. Never run a beater bar across fringe; it tangles and breaks the threads. For hand-knotted rugs, professional cleaning is strongly recommended rather than home washing.
Maintenance checklist to keep with your rug paperwork:
- Vacuum borders weekly on a low-suction setting; avoid the beater bar on fringe and serged edges.
- Spot-clean spills immediately; blot, never rub.
- Condition leather borders two to three times a year.
- Rotate the rug every six to twelve months to distribute wear evenly across the border.
- Arrange professional cleaning annually for rugs in high-traffic rooms or those with delicate borders.
- Avoid placing leather or linen-bordered rugs in rooms with strong, sustained direct sunlight.
Faux leather and Sunbrella-style fabrics are the most forgiving choices in busy family homes because they can be wiped clean rather than spot-treated, and their UV stability means they hold their colour far longer than natural materials in sun-exposed rooms.
How do you measure and order the right border?
Accurate measurement is where many otherwise well-planned border projects go wrong. Follow these steps to avoid the most common pitfalls.
- Measure the raw cut size of your rug. Length and width to the nearest centimetre, before any border is applied. This is the size you give your workroom as the starting point.
- Decide your border width. Common widths are ¾", 1¼", and 2¼". Remember that the border is added to the raw cut size, so a 2¼" border on all four sides increases both dimensions by 4½".
- Note your corner preference. Mitered or lapped. If you are unsure, ask your workroom to show you sample corners before committing.
- Measure doorway clearances and furniture legs. The finished rug must clear door swings and sit correctly under furniture. Cross-reference with your rug size guide if you are uncertain about proportions.
- For stair runners, measure each tread and riser separately. Hallway runner width is typically determined by the stair width minus a consistent reveal on each side; a 10–15 cm reveal on each side is a common design convention, though this varies by staircase width and personal preference.
- Confirm underfloor heating compatibility. Some adhesive-backed binding materials can be affected by sustained heat from underfloor heating systems. Flag this with your workroom at the outset.
Information to supply to your workroom:
- Raw cut dimensions (length × width)
- Pile height and fibre type
- Backing condition (intact, loose, or repaired)
- Desired border width and material
- Corner style (mitered or lapped)
- Stitch type (blind or top-stitch)
- Whether the rug will sit over underfloor heating
- Required finished dimensions and any door clearance constraints
Pro Tip: Never order a border width without calculating the finished size first and checking it against your room plan. The most common ordering error is specifying a border width that pushes the finished rug beyond the furniture legs or into a door swing. Write the finished dimensions on your room plan before you confirm the order.
How does Simmonsinteriorsupply support bespoke borders and trade clients?
Bespoke finishing is where craft and precision meet, and it is the territory where Simmonsinteriorsupply is most at home. The brand specialises in high-end, handcrafted pieces customised in size and finish, collaborating with skilled artisans to produce work that mass-market suppliers simply cannot replicate.
For rug borders specifically, Simmonsinteriorsupply supports:
- Custom border widths across the full range, from narrow ¾" binding to wide 2¼" decorative frames.
- Blind and hidden stitching as a premium finish option for trade and bespoke commissions.
- Hand-serging on wool and high-pile rugs where a seamless, refined edge is the brief.
- Leather and faux leather borders for structured, contemporary schemes.
- Sunbrella and UV-stabilised outdoor fabric borders for conservatories, terraces, and high-humidity environments.
- Sample and swatch ordering so you can confirm colour, texture, and stitch quality before committing to a full commission.
- Trade account support for interior designers, architects, and hospitality procurement teams working to tight specifications and fixed project timelines.
A typical bespoke project begins with a brief: the client supplies raw dimensions, pile type, room use, and a visual reference. Simmonsinteriorsupply's team then recommends a border width, material, and stitch type, and dispatches a sample corner for approval before production begins. The result is a rug that arrives finished to the exact specification, with no ambiguity about colour, scale, or corner treatment.
Pro Tip: If you are a trade client working on a hospitality or staged residential project, request a sample corner in your chosen material and stitch type at least two weeks before your production deadline. This gives you time to approve, request adjustments, and still meet your installation date without rushing the workroom.
Browse the completed project gallery to see finished border examples across a range of materials and room types, or get in touch directly to discuss a trade quotation.
Why the border is the decision most designers leave too late
There is a persistent tendency in interior projects, even well-considered ones, to treat the rug border as a finishing detail rather than a design decision. It gets specified last, often under time pressure, and the result is a border that is technically correct but aesthetically unconsidered.
The border width, in particular, is almost always underestimated in its effect on a room. A wide linen border on a natural-fibre rug does not just finish the edge; it changes the rug's apparent scale, gives it a framed, gallery quality, and creates a visual pause between the pile and the floor. That pause is doing real design work. Choosing a narrow polyester tape because it is quicker to specify is not a neutral decision; it is a decision to let the rug recede rather than hold the room.
The same logic applies to stitch type. Blind stitching costs more and takes longer, but it is the difference between a border that reads as a considered finish and one that reads as a functional edge. On a rug that will anchor a drawing room or a hotel suite for the next decade, that distinction is worth the investment.
The advice here is simple: specify the border at the same time as the pile, not after. Treat it as part of the rug's design, not its packaging.
Simmonsinteriorsupply: bespoke borders crafted to your exact brief
Where most suppliers offer a fixed menu of finishes, Simmonsinteriorsupply works from your brief outward. Whether you need a wide linen border on a natural-fibre rug for a country house sitting room, a hand-serged wool edge for a London townhouse, or a UV-stable Sunbrella finish for a hotel terrace, the team brings the same artisanal rigour to every commission. Trade clients receive dedicated account support, sample corners on request, and production timelines that fit real project schedules rather than generic lead times.

The starting point is always a swatch. Request your border samples, share your raw dimensions and room brief, and the Simmonsinteriorsupply team will recommend the right width, material, and stitch type for your project. Visit Simmonsinteriorsupply to begin your bespoke enquiry, or browse the completed project gallery to see the quality of finish that a properly specified border delivers.
Sources
- 3 Options for Stitching Carpet Edges to Make a Rug
- Rug Border and Binding Guide | Sisal Rugs Direct
- Carpet Binding vs. Carpet Serging: What’s the Difference? - Bond Products Inc.
- Rug Borders
- Carpet Binding vs Serging: Which Finish Is Best?