
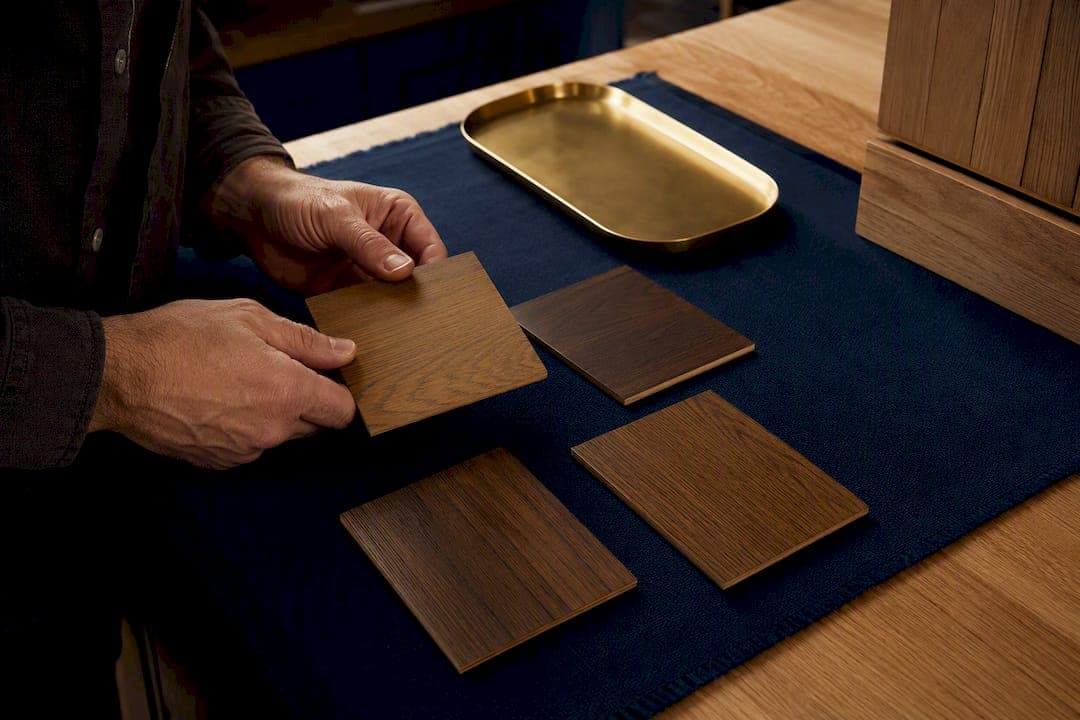
Yes, you can achieve a visually convincing stain match on furniture, and you do it by testing on matching scrap, building colour in layers, and confirming the result under the final topcoat. Precise chemical duplication is not the goal, nor is it usually possible. What professionals chase, and what you should chase too, is harmony that holds up under normal room lighting once the finish goes on.
TL;DR:
- Matching a finish involves layering dye, pigmented stain, and glaze to create visual harmony rather than perfect chemical duplication.
- Testing on matching scrap, recording precise ratios and soak times, and viewing samples under actual room lighting are essential steps for consistent results.
- Topcoat choice and application significantly affect color match, so a sealed sample should be reviewed in both natural and artificial lighting before proceeding.
- Layering helps correct undertone issues by small adjustments with toner or glaze, applied gradually to avoid overcorrection.
- For large or complex projects, professional custom matching ensures consistent color and sheen across multiple pieces.
Table of Contents
- What is stain matching furniture, exactly?
- Which stains, dyes and tools do you actually need?
- How do you run a step-by-step stain match test?
- How does layering fix undertone problems?
- Why does the topcoat change your match completely?
- What mistakes ruin most DIY stain matches?
- Trade workshop notes: keeping a reproducible log
- How do you blend stain edges so the join disappears?
- How do you recreate wood grain, not just colour?
- What's the right way to seal and finish a matched stain?
- Craft perspective: visual harmony over chemical identicality
- How Simmons Interior Supply handles custom finish matching
- Sources
What is stain matching furniture, exactly?
"Stain matching" gets used loosely, but the trade term for what you are actually doing is colour matching a wood finish, a process built from three distinct layers rather than one tin of stain. Professional finishers describe this as an exercise in visual harmony rather than precision replication: you match the background colour first, then layer stain and glaze until the eye reads the two pieces as belonging together, according to Wood Magazine's guidance on matching new stain to old wood. This matters because most failed matches happen when someone reaches for a single "close enough" stain colour and expects it to solve undertone, grain contrast, and sheen all at once. It rarely does.
Here is a fast route into the bench workflow before the detailed steps below:
- Collect matching scrap, ideally from the same species and cut, and sand it to the same final grit as your project piece.
- Assemble your kit: a dye concentrate, a pigmented wiping stain, thinner or mineral spirits, foam brushes, and several small test tins.
- Run the layering sequence on scrap: dye first, pigmented stain second, a toner or glaze third, then a thin sealer and a topcoat sample.
- View every sample under the lighting your finished piece will actually sit in, and write down every measurement and soak time as you go.
That log is not optional busywork. Without it, a match you nail on Tuesday becomes unreproducible by Friday.
Which stains, dyes and tools do you actually need?
Three product families do three different jobs, and confusing them is where most matching attempts go wrong.
- Dyes control background colour and undertone. They penetrate evenly and give you a clean base to build on, particularly useful on woods that blotch.
- Pigmented stains carry the grain. The pigment particles lodge in open pores and soft grain lines, which is what gives oak or ash its characteristic contrast.
- Toners and glazes are for fine adjustment after the first two layers, nudging a result that is close but not quite right.
Water-based dyes dry fast and raise grain, so you will need a light sand between coats. Oil-based pigmented stains give you a longer working window, which helps enormously when you are wiping large surfaces and need even penetration. Fast-dry lacquer-based systems suit small repair jobs where you cannot wait overnight between layers, but they punish hesitation. Whichever line you choose, work in a ventilated space and keep solvent-soaked rags in a sealed metal container, since oily rags are a genuine fire risk once bundled and left in a warm workshop.
Pro Tip: Buy the smallest tin size available for your first test round. A half-pint you get wrong costs you nothing; a quart you get wrong is money and time down the drain.
How do you run a step-by-step stain match test?
Bench testing follows a repeatable sequence, and skipping steps is what turns a two-hour job into a weekend of stripping and starting again.
- Prepare the scrap. Use offcuts from the same species and, if possible, the same board, sanded to the identical grit you will use on the finished piece. Different boards, and even different sections of the same tree, absorb stain unevenly, which is why professionals keep a running library of test scraps for every job.
- Condition where needed. Blotch-prone woods such as pine, cherry, and birch need a pre-stain conditioner or a diluted dye coat before anything else goes on.
- Mix and measure. Note every ratio: dye concentrate to water or alcohol, stain to thinner, glaze to retarder. Write it down before you apply it, not after.
- Apply and time the soak. Wipe or brush the first layer, log the exact number of minutes before you wipe back, and repeat for each subsequent layer.
- Seal and judge. Once you think you are close, brush on a thin washcoat or sanding sealer. This reveals the "wet" look your final topcoat will produce, a step Popular Woodworking identifies as standard practice among finishers matching an existing colour.
- Iterate in small batches. Adjust one variable at a time, tiny amounts of colourant or a longer soak, and retest rather than reworking the whole formula from scratch.
This loop feels slow the first time you run it. By the third or fourth test board, you will have a formula you trust enough to scale up.
How does layering fix undertone problems?
Layering exists because a single stain almost never carries background colour, grain definition, and undertone correction all at once. The standard professional sequence starts with an NGR (non-grain-raising) dye to set the base colour, adds a pigmented stain to bring back grain contrast, then finishes with a toner or glaze for the last adjustment, a method Popular Woodworking's finishing guide sets out as the repeatable approach pros rely on.
Undertone correction uses basic colour wheel logic. If your test board is reading too orange against the original piece, a small amount of blue or green pigment mixed into the glaze cancels it. Too pink, and a touch of green or yellow pulls it back towards neutral. The key word is small: professionals typically add primary colourants in tiny increments, resealing between each addition to judge the shift stepwise rather than guessing at a full correction in one go.
- Use a dye to set the base tone across the whole surface evenly.
- Wipe on a pigmented stain to restore grain depth once the dye has dried.
- Mix toners thin and spray them in light passes for even coverage on large panels, or wipe them by hand on smaller repair areas where a brush gives you more control.
- Some manufacturers' stain ranges let you blend two off-the-shelf colours to land on an intermediate tone quickly, which narrows your starting point before custom mixing.
Pro Tip: Spray application gives you the most even toner coat, but a folded cotton cloth works nearly as well on a single drawer front or chair leg where setting up a sprayer isn't worth the time.
Why does the topcoat change your match completely?
A perfect dry stain match can fall apart the moment the topcoat goes on, because most clear finishes add an amber cast and extra depth of their own. Oil-based polyurethane and traditional varnish shift colour noticeably more than water-based lacquer, which is one reason professionals never sign off on a match until they have applied the actual finish to the test board.
Lighting compounds the problem. A match that looks flawless under your workshop's fluorescent tubes can read completely differently under a room's warm lamplight or north-facing daylight, which is why professionals always view test samples in the room's actual lighting conditions, as The RE Store's guidance on matching stains to old wood confirms. One in-workshop test simply is not enough.
Before you call a match finished, work through this checklist:
- Apply the intended topcoat, not just a sealer coat, to your final test sample.
- View the sealed sample under both natural daylight and the artificial lighting the finished piece will actually sit under.
- Photograph the sample under that lighting for a permanent record.
- Get sign-off, whether that is your own final check or a client's approval, before committing stain to the full piece.
What mistakes ruin most DIY stain matches?
Most matching failures trace back to a handful of repeated mistakes, and nearly all of them are fixable if you catch them early enough.
- The single-stain trap. Reaching for one off-the-shelf colour and expecting it to solve everything is the most common error DIYers make. Build colour gradually from a lighter base instead of committing to a dark stain in one pass.
- Blotching. Pine, cherry, and other tight, uneven-grained woods drink stain unevenly without preparation. A pre-stain conditioner or a diluted dye base first solves this almost every time.
- Overshot colour. If your test goes too dark or too warm, a toner with a complementary tint can pull it back, or you can feather a lighter glaze over the edge and retest. If the colour is badly wrong, sanding back to bare wood on that section and restarting the layering sequence is faster than trying to rescue it.
Catch these on your scrap board, not on the actual furniture.
Trade workshop notes: keeping a reproducible log
Luke, from Simmons Interior Supply's furniture team, keeps every test formula logged the same way a chemist would, because a match you cannot reproduce is not really a match at all.
- Species and grit: record the wood and the exact sanding grit used before staining.
- Layer ratios: dye dilution, stain-to-thinner ratio, and glaze mix, written down as you mix, not afterwards.
- Soak and wipe times: exact minutes for each layer, since ten seconds longer can shift depth noticeably.
- Lighting notes: where and under what light the sample was judged and photographed.
This is the same discipline behind Simmons Interior Supply's approach to matching furniture finish types, where formulas are coded so a client's reorder years later still matches the original.
How do you blend stain edges so the join disappears?
A visible line where old finish meets new stain is usually a feathering problem, not a colour problem. Even a near-perfect colour match will show a hard edge if the transition is abrupt, so the technique is to work the new stain outward in decreasing concentration rather than stopping at a fixed boundary.
Start by wiping the new stain slightly beyond the repair area, then use a clean cloth dampened with thinner to soften the outer edge before it dries fully. This pulls pigment gradually thinner as you move away from the centre, which mimics how natural wood colour varies subtly across a single board anyway. On a tabletop repair, work in a rough oval rather than a hard-edged rectangle, since straight lines are what the eye catches first.
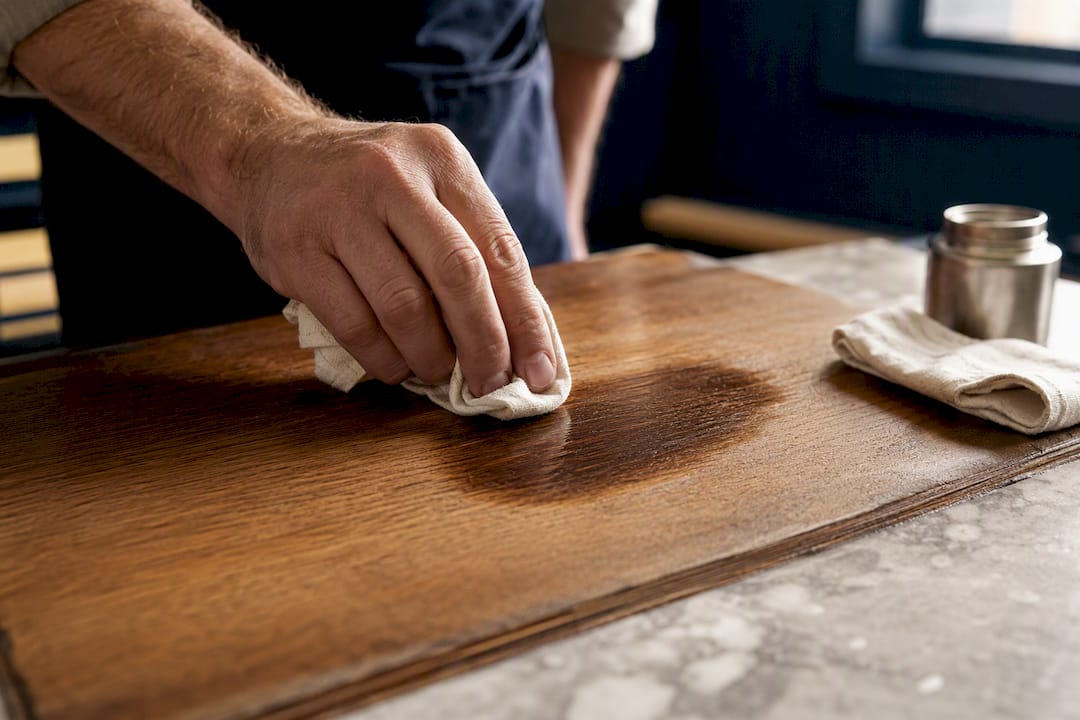
For larger panels, a hand-held spray gun set to a light mist pattern blends far more evenly than a brush, because you can build up colour in thin passes and stop the moment the transition disappears. If you are wiping by hand, keep a second clean rag ready specifically for feathering, separate from the one you use to apply stain, so you are not reapplying colour while trying to soften it.
Always check the blended edge once dry and again once sealed, since a feathered edge that looks invisible dry can reappear faintly once the topcoat adds depth. If it does, a very light toner pass over the whole repaired section, not just the edge, usually resolves it without creating a second visible line.
How do you recreate wood grain, not just colour?
Colour without grain texture reads as fake even when the hue is spot on, because the eye is picking up pattern as much as tone. Matching grain means understanding that pigmented stains, not dyes, are what carry visible grain contrast, since pigment particles settle into open pores and soft early-wood grain lines while dye penetrates more uniformly across the whole surface.
If you are working on a repair patch within an existing piece, check the grain direction and figure of the surrounding wood before you even reach for stain. A quarter-sawn oak panel has a distinctly different fleck pattern to a flat-sawn board of the same species, and no stain colour will disguise that mismatch. Choosing your patch material to echo the grain figure of the surrounding wood matters more than most people expect, a point worth weighing when selecting wood species for a project.
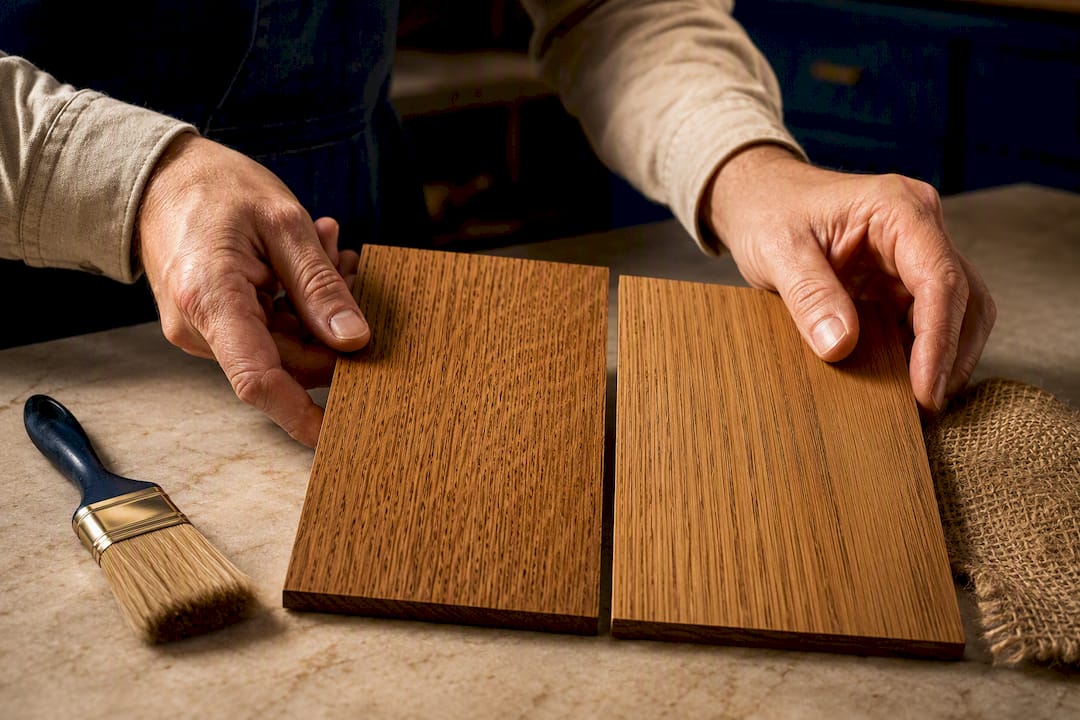
Glazes can help fake texture on a smaller scale. A glaze wiped on and then pulled through with a dry brush or a piece of coarse burlap can mimic open grain on a patch that lacks it naturally, a trick furniture restorers use on filled or sanded-through sections where the original pore structure has been lost. This will not fool a close inspection under a loupe, but it holds up at normal viewing distance, which is the standard that actually matters in a finished room.
What's the right way to seal and finish a matched stain?
The sealing step is where a good match either locks in or falls apart, because a mismatched or incompatible topcoat can shift the colour you worked hard to achieve. Always test your intended topcoat, whether that is oil-based polyurethane, water-based lacquer, or wax, on the same sealed sample board you used to judge the stain match, not on a separate untested piece.
Apply a thin sealer coat first rather than jumping straight to a heavy topcoat. This does two things: it locks the stain layers in place so subsequent coats do not lift or muddy the colour, and it gives you one last honest look at the true colour before committing to the full finish schedule. If the sealed sample still looks right, proceed with your chosen topcoat in thin, even coats rather than one thick application, since a heavy first coat is more likely to amber unevenly or pool in corners and mouldings.
Sheen level matters as much as colour. A satin topcoat on the repaired section next to a gloss original, or vice versa, will read as a mismatch even when the underlying stain is identical, so match sheen deliberately rather than using whatever topcoat happens to be open in the workshop. Let each coat cure fully before the next, and avoid handling the piece heavily until the final coat has hardened, since fingerprints and light scuffing during cure can dull an otherwise perfect sheen match permanently.
Craft perspective: visual harmony over chemical identicality
Chasing an exact chemical duplicate of an old finish is a losing game, and most DIYers who fail at stain matching are fighting the wrong battle. The eye judges harmony across a room, not molecular composition under a microscope, so a formula that reads as "belonging" under normal lighting has succeeded, full stop.
That said, know your limit. Antique pieces, matched sets across multiple rooms, or anything destined for a client's home are where a bespoke professional match earns its cost, because the margin for a visible mismatch in those settings is much smaller than on a single garage-built shelf.
— Luke
How Simmons Interior Supply handles custom finish matching
There are DIY routes worth trying first, testing on scrap, layering dye and stain, judging under a sealer, and for a single repair or a well-loved family piece, that bench process will usually get you there. Where it gets harder is matching a finish precisely across a full suite of furniture, a hospitality installation, or a design scheme where every piece has to read as one family under the same lighting.

That is where Simmons Interior Supply's custom finish process earns its keep. Every bespoke piece is finished to a coded, repeatable formula, so a sample you approve today can be reordered years later without the guesswork of re-matching from scratch. Our team works through sample approval with you before a full piece is finished, meaning you sign off on the exact colour and sheen under real lighting, not a swatch card. If you are specifying furniture for a project where consistency across multiple pieces matters, browse our gallery of completed bespoke finishes or explore our custom finish options to see how the specification process works, then request a quote to start your own sample approval.