
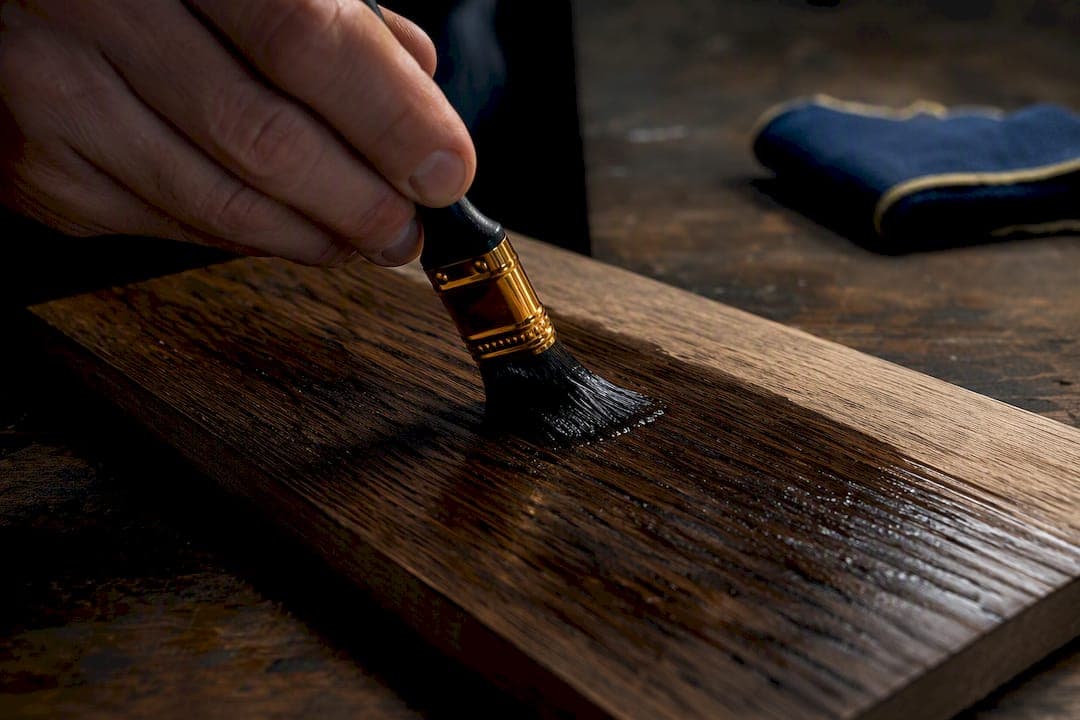
Ebonizing is a chemical reaction, not a stain: iron acetate meets the tannins already in the wood and forms ferric tannate, a black compound seated inside the fibres rather than sitting on top of them. The fastest DIY route is homemade, dissolving clean steel wool in white vinegar to brew your own iron acetate. Oak, walnut and other tannin-rich timbers will darken quickly; low-tannin woods need a tea or bark pre-treatment first to reach true black rather than grey.
TL;DR:
- Oak and walnut woods yield a deep black color quickly due to their high tannin content, while low-tannin woods like maple require tannin pre-treatment for true black.
- Proper surface preparation and consistent application are crucial; oversanding or uneven application can cause patchy or grey results, especially on less tannin-rich species.
- Brewed iron acetate should be strained and stored in a sealed, dark container; adding a drop of dish soap improves penetration, and drying times are 30 to 60 minutes between coats.
- Applying a tannin boost with strong tea or quebracho bark helps achieve full black on low-tannin woods, with repeated coats often necessary for stubborn species.
- The stability and permanence of ferric tannate mean the color will not fade once formed, but the final hue depends heavily on the wood's tannin levels and moisture content.
Table of Contents
- Why ebonizing works: the chemistry in plain terms
- Materials and tools: what to buy and safety notes
- How to make iron acetate reliably at home
- Preparing the wood and applying the solution
- Getting true black on low-tannin woods: tea and bark methods
- Finishing the ebonized surface: topcoats and visual effects
- Troubleshooting common problems and targeted fixes
- Workshop-tested tips from an experienced furniture finisher
- Effect of wood moisture content on ebonizing results
- When to choose ebonizing over paint or a surface stain
- Sources
Why ebonizing works: the chemistry in plain terms
The reaction is straightforward once you see it laid out. Iron acetate, formed when steel wool corrodes in vinegar's acetic acid, contains iron ions that seek out tannic and gallic acids already present in wood. When they meet, they bond into ferric tannate, a deep black compound that forms inside the wood's cell structure rather than as a film on the surface.
That distinction explains a lot of confusion around the technique. Plain rust (iron oxide) gives you an orange-brown tint, the sort you see on a corroded nail. Ferric tannate is different chemistry entirely, and it is what produces genuine black rather than a rusty stain.
Species matters enormously here, because tannin concentration varies wildly across timber types.
- Oak (especially white oak) is famously tannin-rich and ebonizes fast and reliably.
- Walnut has enough natural tannin to go a deep charcoal-black with a single application.
- Cherry contains moderate tannin and usually needs two coats for full depth.
- Maple, ash, and poplar are tannin-poor and will only go grey without pre-treatment.
Colour change is fast, appearing within minutes of application, though the solution itself needs 48 to 72 hours to brew properly before use. Once ferric tannate has formed, the colour change is permanent. It's not going anywhere: sand into it and you will simply expose more of the same black chemistry beneath, provided the reaction has penetrated evenly.
Materials and tools: what to buy and safety notes
You need surprisingly little to get started, and most of it is available from a hardware shop or supermarket rather than a specialist supplier.
- Steel wool, grade 0000 (the finest available), with the oily coating washed off first.
- White vinegar, 5% acetic acid — avoid malt or coloured vinegars, which introduce impurities and off-tones.
- Rusty nails or wire wool scraps work as a lower-preference alternative if steel wool isn't to hand, though the reaction is slower and less predictable.
- Strong black tea bags or quebracho bark powder for tannin pre-treatment on pale species.
- Foam brushes, natural-bristle brushes, or clean rags for application.
- Nitrile gloves and eye protection, plus a well-ventilated space.
Disposal is worth thinking about before you start, not after. Spent iron acetate and the rusted steel wool residue are mild irritants rather than hazardous waste, but pour leftover solution down a drain sparingly and diluted, and bag solid iron residue for general waste rather than tipping it straight into a garden bed, where it can leave rust staining on paving or stonework.
Pro Tip: Keep a dedicated "dirty" jar lid or squirt bottle for decanting small amounts of solution during application. Dipping brushes straight into your main batch introduces wood fibres and dust that shorten its usable life.
How to make iron acetate reliably at home
Consistency comes from process, not luck. Follow the same sequence every time and your results will stop varying batch to batch.
- Wash the steel wool in warm water to strip the protective oil coating, then squeeze it dry.
- Submerge it fully in white vinegar inside a glass jar, using roughly one pad of 0000 wool per 250ml of vinegar as a starting ratio.
- Leave it uncovered or loosely covered for 48 to 72 hours. You'll know it's ready when the liquid turns a murky orange-brown and the steel wool has visibly broken down.
- Strain the solution through an old cloth or coffee filter to remove solid iron fragments before use.
- Dilute with water if you want a milder, more controlled darkening effect on lighter woods, or for a first test coat.
- Add a drop of dish soap to the strained solution to break surface tension and improve penetration into tight grain, a trick borrowed from cabinet workshops.
- Store in a labelled, sealed glass jar away from direct sunlight. It keeps for several weeks, though potency fades gradually as the iron settles out.
Preparing the wood and applying the solution
Surface prep decides more of the final result than most people expect, so it deserves proper attention before any liquid touches the timber.
- Sand progressively through 120, then 150, then 180 grit. Stop before you reach the finer grits typically used for staining. Because ebonizing works chemically rather than sitting on the surface, oversanding closes the pores the reaction needs to penetrate.
- Raise the grain first with a light water wipe and a final light sand once dry, so the ebonizing solution doesn't cause the same swelling later and leave a rough texture.
- Apply generously with a brush, rag, or spray bottle, working in manageable sections rather than the whole piece at once. A tabletop, for instance, is better handled in thirds than attempted in a single continuous pass.
- Watch the colour develop in real time. You should see darkening begin within a minute or two on high-tannin woods.
- Let it dry fully, typically 30 to 60 minutes depending on humidity, before judging the final tone. Wet ebonized wood always looks darker than it will once cured.
- Reapply if the colour is patchy or too light, allowing each coat to dry before adding the next. Two to three coats is normal on woods with only moderate tannin.
- Lightly sand between coats with fine paper if the surface feels raised or fuzzy, wiping away dust before the next application.
Pro Tip: Test on an offcut from the same board before committing to the visible face. Grain density can vary even within a single plank, and a hidden edge tells you exactly what to expect.
Getting true black on low-tannin woods: tea and bark methods
Maple, ash, and poplar simply don't carry enough natural tannin to blacken properly on their own, so you have to bring the tannin to the wood instead.
- Brew strong black tea, four or five bags steeped in a cup of boiling water for at least ten minutes, then apply while still warm and let it soak in fully before drying.
- Quebracho bark powder gives a stronger boost than tea, and is the preferred choice for stubborn species. Boil a tablespoon of powder in a cup of water for fifteen minutes, strain, and apply the same way.
- Wear a dust mask when handling quebracho powder, since the fine particles are an inhalation irritant.
- Test on scrap first, and repeat the tannin coat if a first pass still leans grey after the iron acetate goes on. Two tannin applications before ebonizing is common on genuinely stubborn maple.
Finishing the ebonized surface: topcoats and visual effects
Ebonized wood accepts every standard topcoat, but the choice you make changes the character of the black more than it changes how well it holds up.
- Penetrating oils (tung oil, Danish oil) deepen and warm the black, adding a slight brown undertone that many woodworkers find flattering on furniture.
- Water-based polyurethane keeps the tone cooler and more neutral, closer to a true jet black, and suits contemporary pieces.
- Shellac adds warmth and an old-world sheen, echoing the historic use of ebonizing on pianos and fine furniture.
- Wax gives a soft, low sheen finish that reads as vintage rather than glossy, though it offers the least protection against water and heat.
Because iron tannate is chemically stable once formed, the topcoat isn't holding the colour in place, it's simply framing it. For furniture that sees daily use, plan to refresh oil or wax finishes every year or two; harder topcoats like poly need attention far less often. Reading through our guide on furniture finish types is worth doing before you settle on a topcoat, since the right pairing depends heavily on how a piece will actually be used.
Troubleshooting common problems and targeted fixes
Most ebonizing disappointments trace back to one of three causes, and each has a specific fix rather than a general "try again and hope" approach.
- Result looks grey instead of black: the wood lacked sufficient tannin. Apply a black tea or quebracho pre-treatment, let it dry fully, then reapply the iron acetate.
- Patchy or uneven darkening: usually caused by inconsistent application or pore density varying across the board. Add a drop of dish soap to your solution to improve penetration, sand the patchy area lightly, and reapply.
- Solution too weak to react visibly: brew longer, or use a fresher batch. Iron acetate that's sat too long loses potency as the iron settles out of suspension.
- Tacky or gritty residue on the surface: this is usually leftover iron sediment. Wipe with a clean, dry cloth once fully cured, and strain your solution more thoroughly next time before applying.
These fixes reflect the most common documented failure modes in ebonizing: insufficient tannin, uneven application, and pore resistance. Nearly every problem you'll encounter fits one of those three categories.
Workshop-tested tips from an experienced furniture finisher
Small refinements separate a passable ebonized panel from one that looks intentional and controlled.
- Dose your surfactant carefully. One drop of dish soap per 250ml of solution is enough. More than that and you risk a slight soapy film that dulls the topcoat later.
- Save your iron-laden dust. Fine sanding residue from an already-ebonized piece can, in small amounts, be worked into touch-up areas to blend a repair, though this only works when the dust is genuinely clean and free of finish contamination.
- Consider oxidising rather than full ebonizing when you want cool blues and greys instead of jet black. A lighter, more dilute solution on a low-tannin wood gives exactly that effect deliberately, rather than as an accident.
Documenting wood lot and reaction time for every batch, and labelling test panels accordingly, is what makes it possible to reproduce the same tone across a run of commissioned pieces rather than treating each board as a fresh experiment.
That discipline around batching and labelling matters more on multi-piece commissions than on a single weekend project, where a little variation barely registers.
— Luke
Effect of wood moisture content on ebonizing results
Moisture content changes how iron acetate behaves inside the timber, and it's one of the most overlooked variables in the whole process. Wood that's too wet resists penetration because the cell structure is already saturated with water, leaving less room for the solution to travel into the fibres. The result tends to be shallow, patchy colour that looks fine wet but fades disappointingly once the piece dries out fully.
Overly dry wood, on the other hand, can absorb the solution too fast and unevenly, pulling it deep into some areas while leaving neighbouring sections comparatively starved.
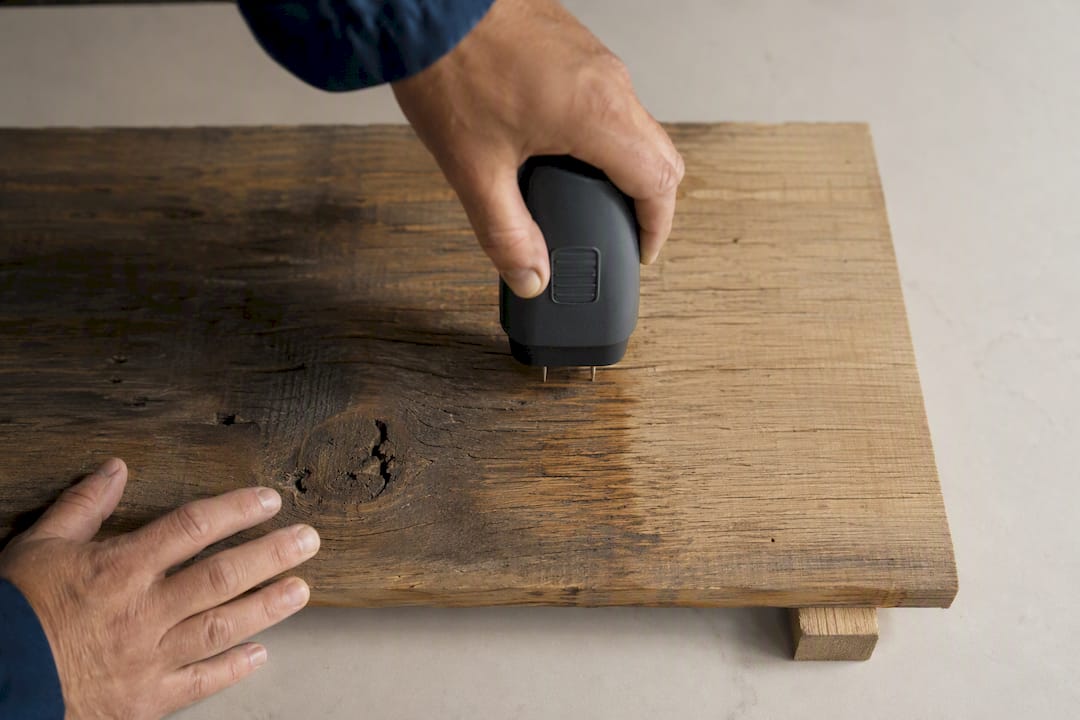
If you're working with reclaimed timber or anything stored in a damp shed, let it acclimatise indoors for at least a week before starting. A cheap pin-type moisture meter removes the guesswork entirely and costs less than a decent set of chisels. Consistent moisture across a board also matters more than the average figure: a plank that's dry at one end and damp at the other will ebonize unevenly no matter how carefully you apply the solution, so check more than one spot before committing.
When to choose ebonizing over paint or a surface stain
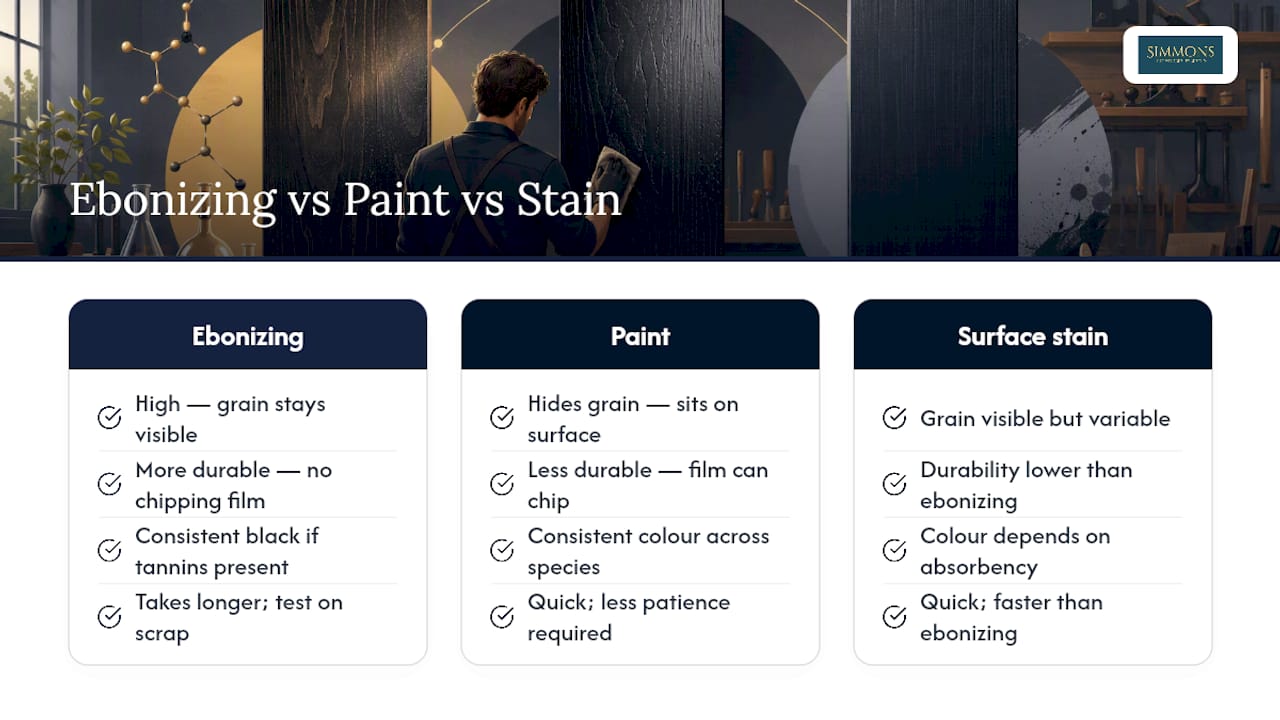
Ebonizing earns its place when you want depth and grain visibility that black paint simply cannot deliver. Paint sits on top of the wood and hides its structure; ebonizing works from within it, so the figure and texture of oak or walnut stay visible under the black. It's also considerably more durable against scratches than a painted surface, since there's no film to chip away and reveal a lighter colour beneath.
Where a surface stain falls short is consistency across species. Stain colour depends heavily on how absorbent the wood is, whereas ebonizing gives a genuinely black result once tannin is present, whether natural or added. That said, ebonizing takes longer and demands more patience than either paint or stain, and it rewards testing on scrap before committing to a visible piece.
For a straightforward side table or shelf, this is a rewarding weekend project. For a large commissioned piece where colour must match precisely across several boards, or where the client needs total consistency and can't afford a failed test run, it's worth weighing the case for a bespoke commission against a DIY attempt, since a skilled finisher can control batch variation in ways that are hard to replicate at home.
If your project has reached that scale, whether a boardroom table or a hospitality commission where several matching pieces need to leave the workshop looking identical, Simmons Interior Supply works directly with skilled artisans to achieve exactly this kind of controlled, repeatable finish. Our bespoke nest of coffee tables shows what a professionally ebonized and finished piece looks like when tone consistency across multiple items genuinely matters, and we're always happy to talk through finish options for a custom commission.
Sources
For deeper technical grounding, see Ebonising on Wikipedia and the Fine Woodworking process guide. Our own wood species selection guide covers tannin content across common furniture timbers.
- How Does Ebonizing Wood Work? — WoodWiki
- Ebonizing Wood with Steel Wool and Vinegar — FineWoodworking
- How To Ebonize Wood — Popular Woodworking
- Ebonising — Wikipedia